

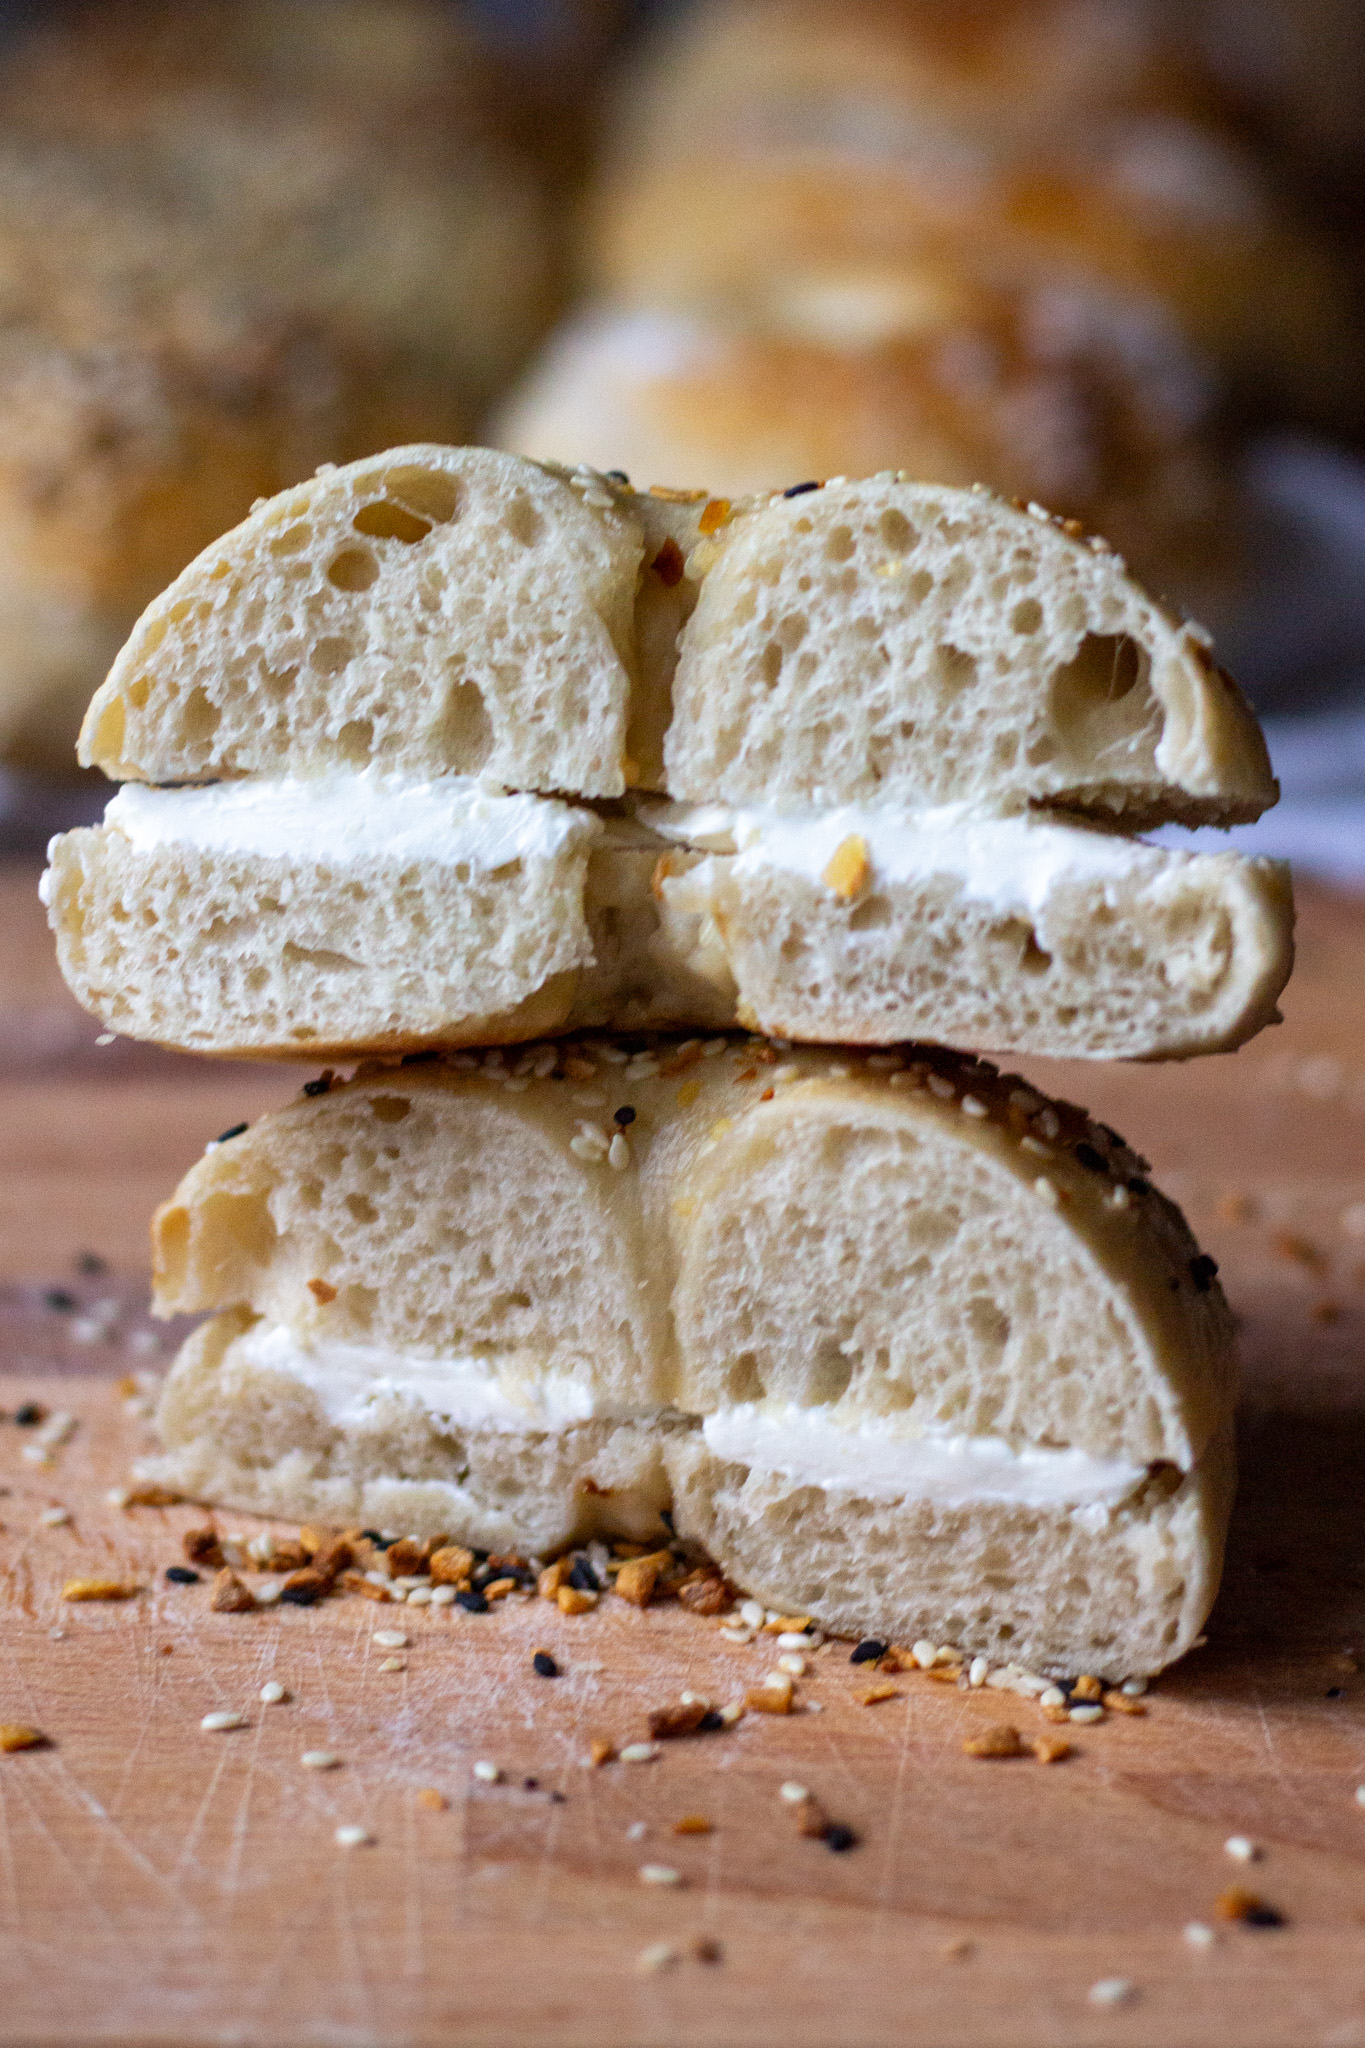
These bagels are inspired by New York style bagels, made with sourdough and using ingredients you already have.
These have the BEST flavor from the slow rise and the perfect texture - a soft, chewy crust, and a squishy, dense interior.
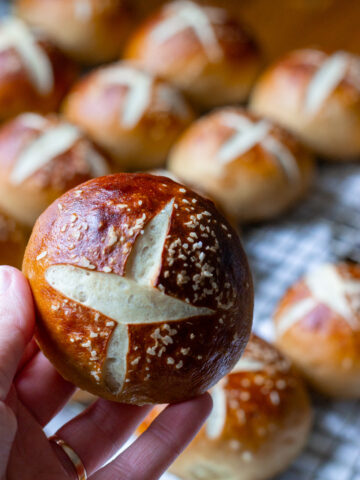
Yes, two weeks in a row of sharing a recipe that has taken me YEARS to nail down. (Last week was the star bread of my dreams, if you missed it!)
I'm going to be riding this high for a long time! (But don't worry, I am as we speak also working on my post of *fails* from the year, so I will likely still stay relatively humble.)
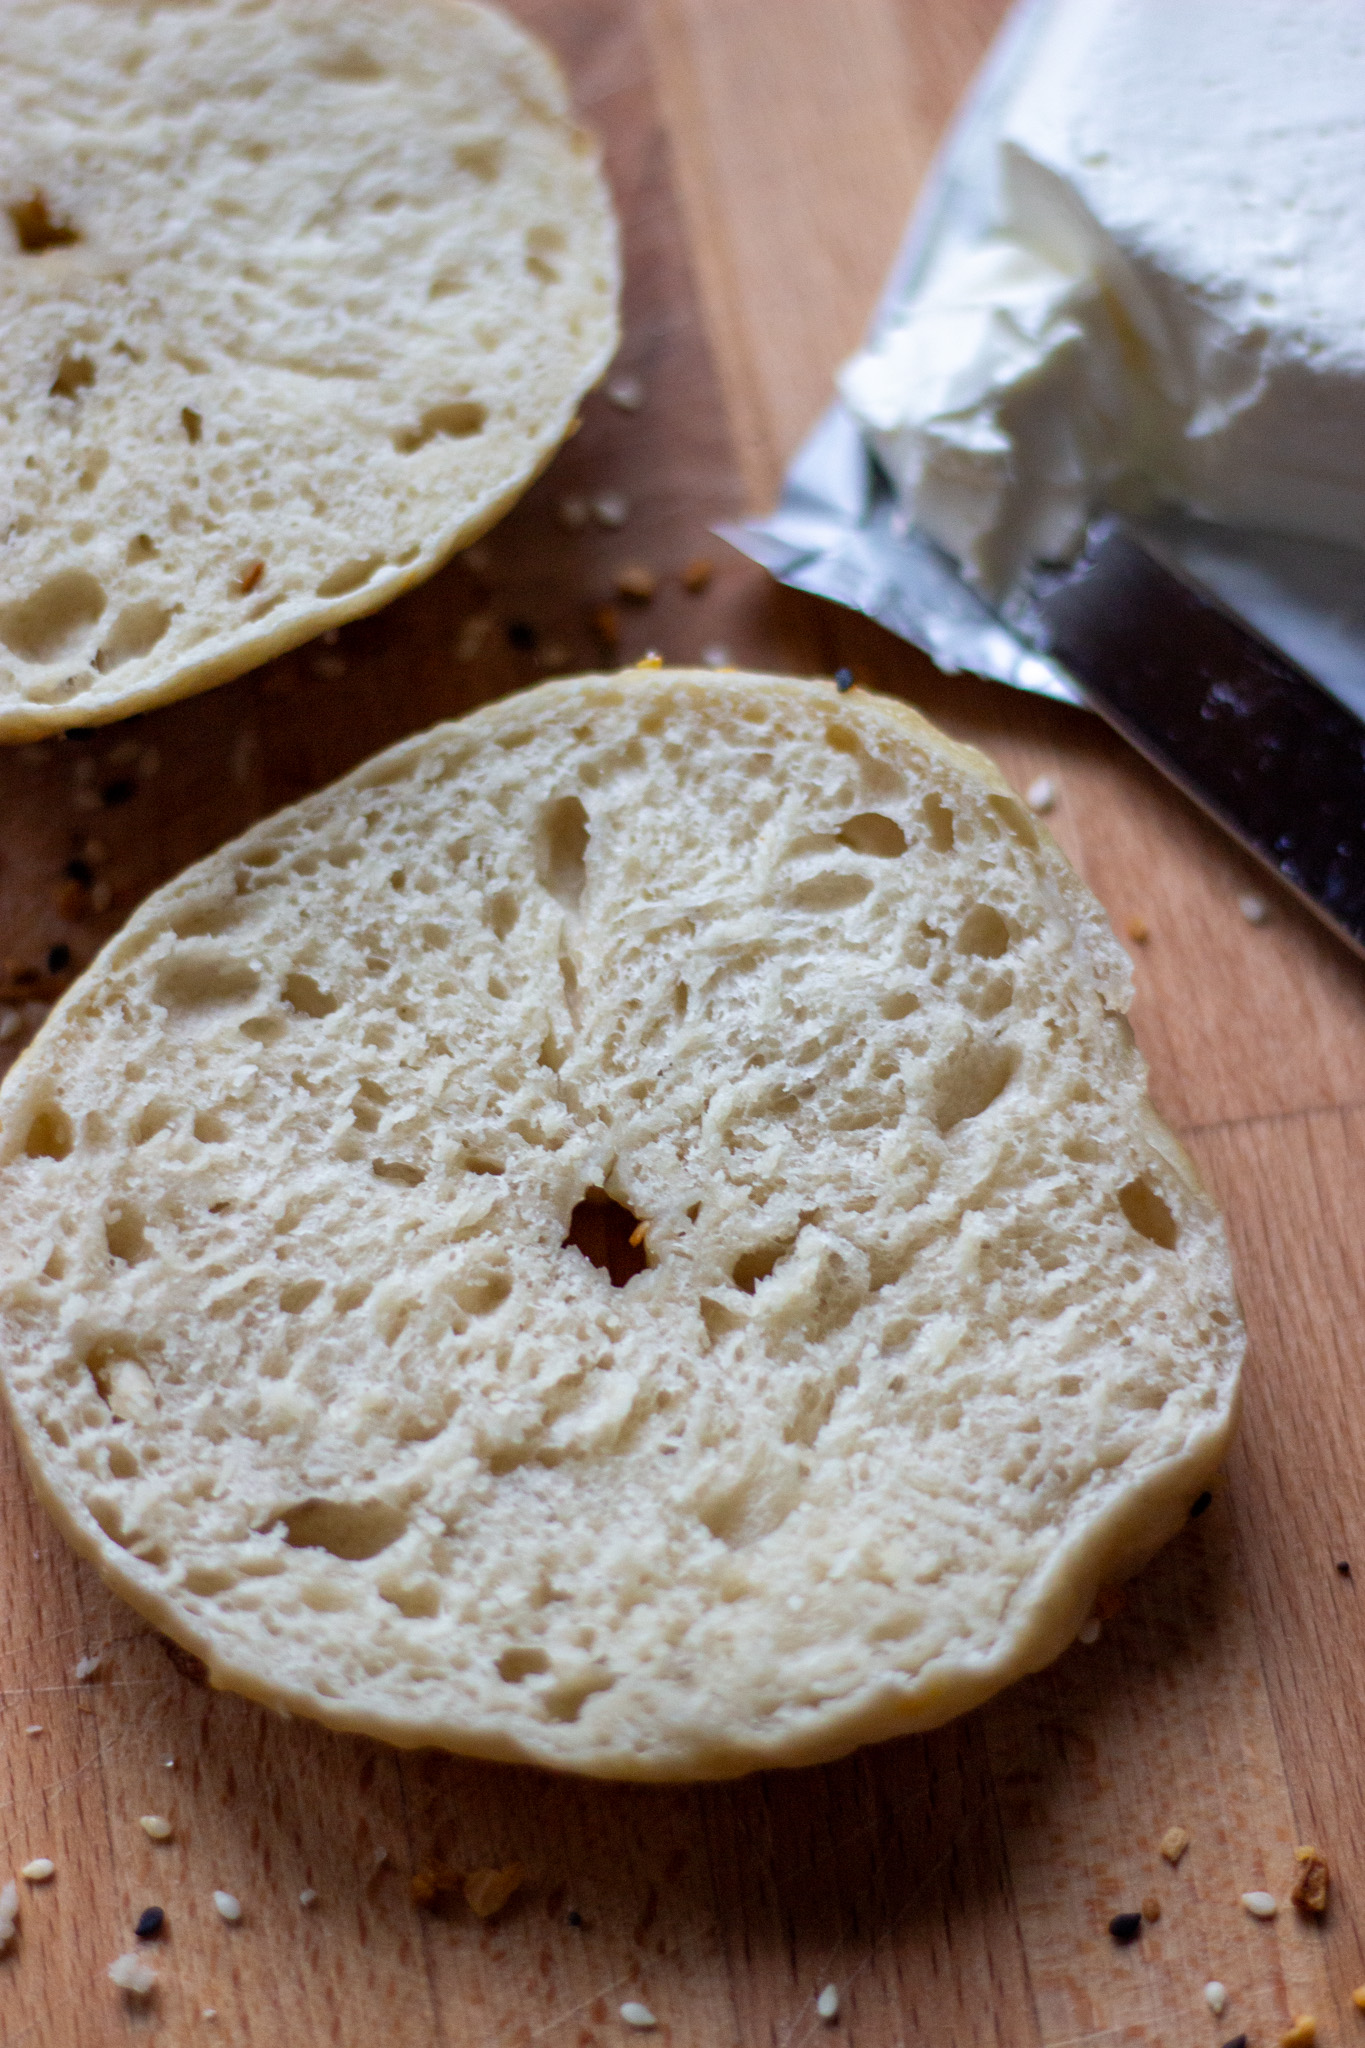
These bagels though are the best I've ever had. And I consider myself somewhat of a bagel connoisseur. They're soft, chewy, and have the best flavor from the brown sugar in the dough and the baking soda bath. And the slow rise takes these to levels I didn't know bagels could go.
You MUST eat one warm. It's the law of making your own bagels. These take roughly 15 hours from start to finish and it's worth every second for that first bite of a warm, chewy, fresh-from-the-oven bagel with cream cheese layered thick and slightly melty.
It is maybe the pinnacle of American cuisine and you - yes you! - can experience it in your very own kitchen.
Now that I've sufficiently hyped these up (and no, I don't think I'm overdoing it at all!), let me tell you everything you need to know for complete bagel success.
The dough
Good news/bad news here. Bagel dough is low hydration which means it is EASY to shape but VERY HARD to mix. If sticky sourdough is your arch nemesis, make bagels! The dough sticks to almost nothing!
If you have a stand mixer, I highly recommend you mix this dough up with your dough hook attachment.
If you don't have a stand mixer, you can most definitely mix it by hand - it will just take some patience and strong forearms.
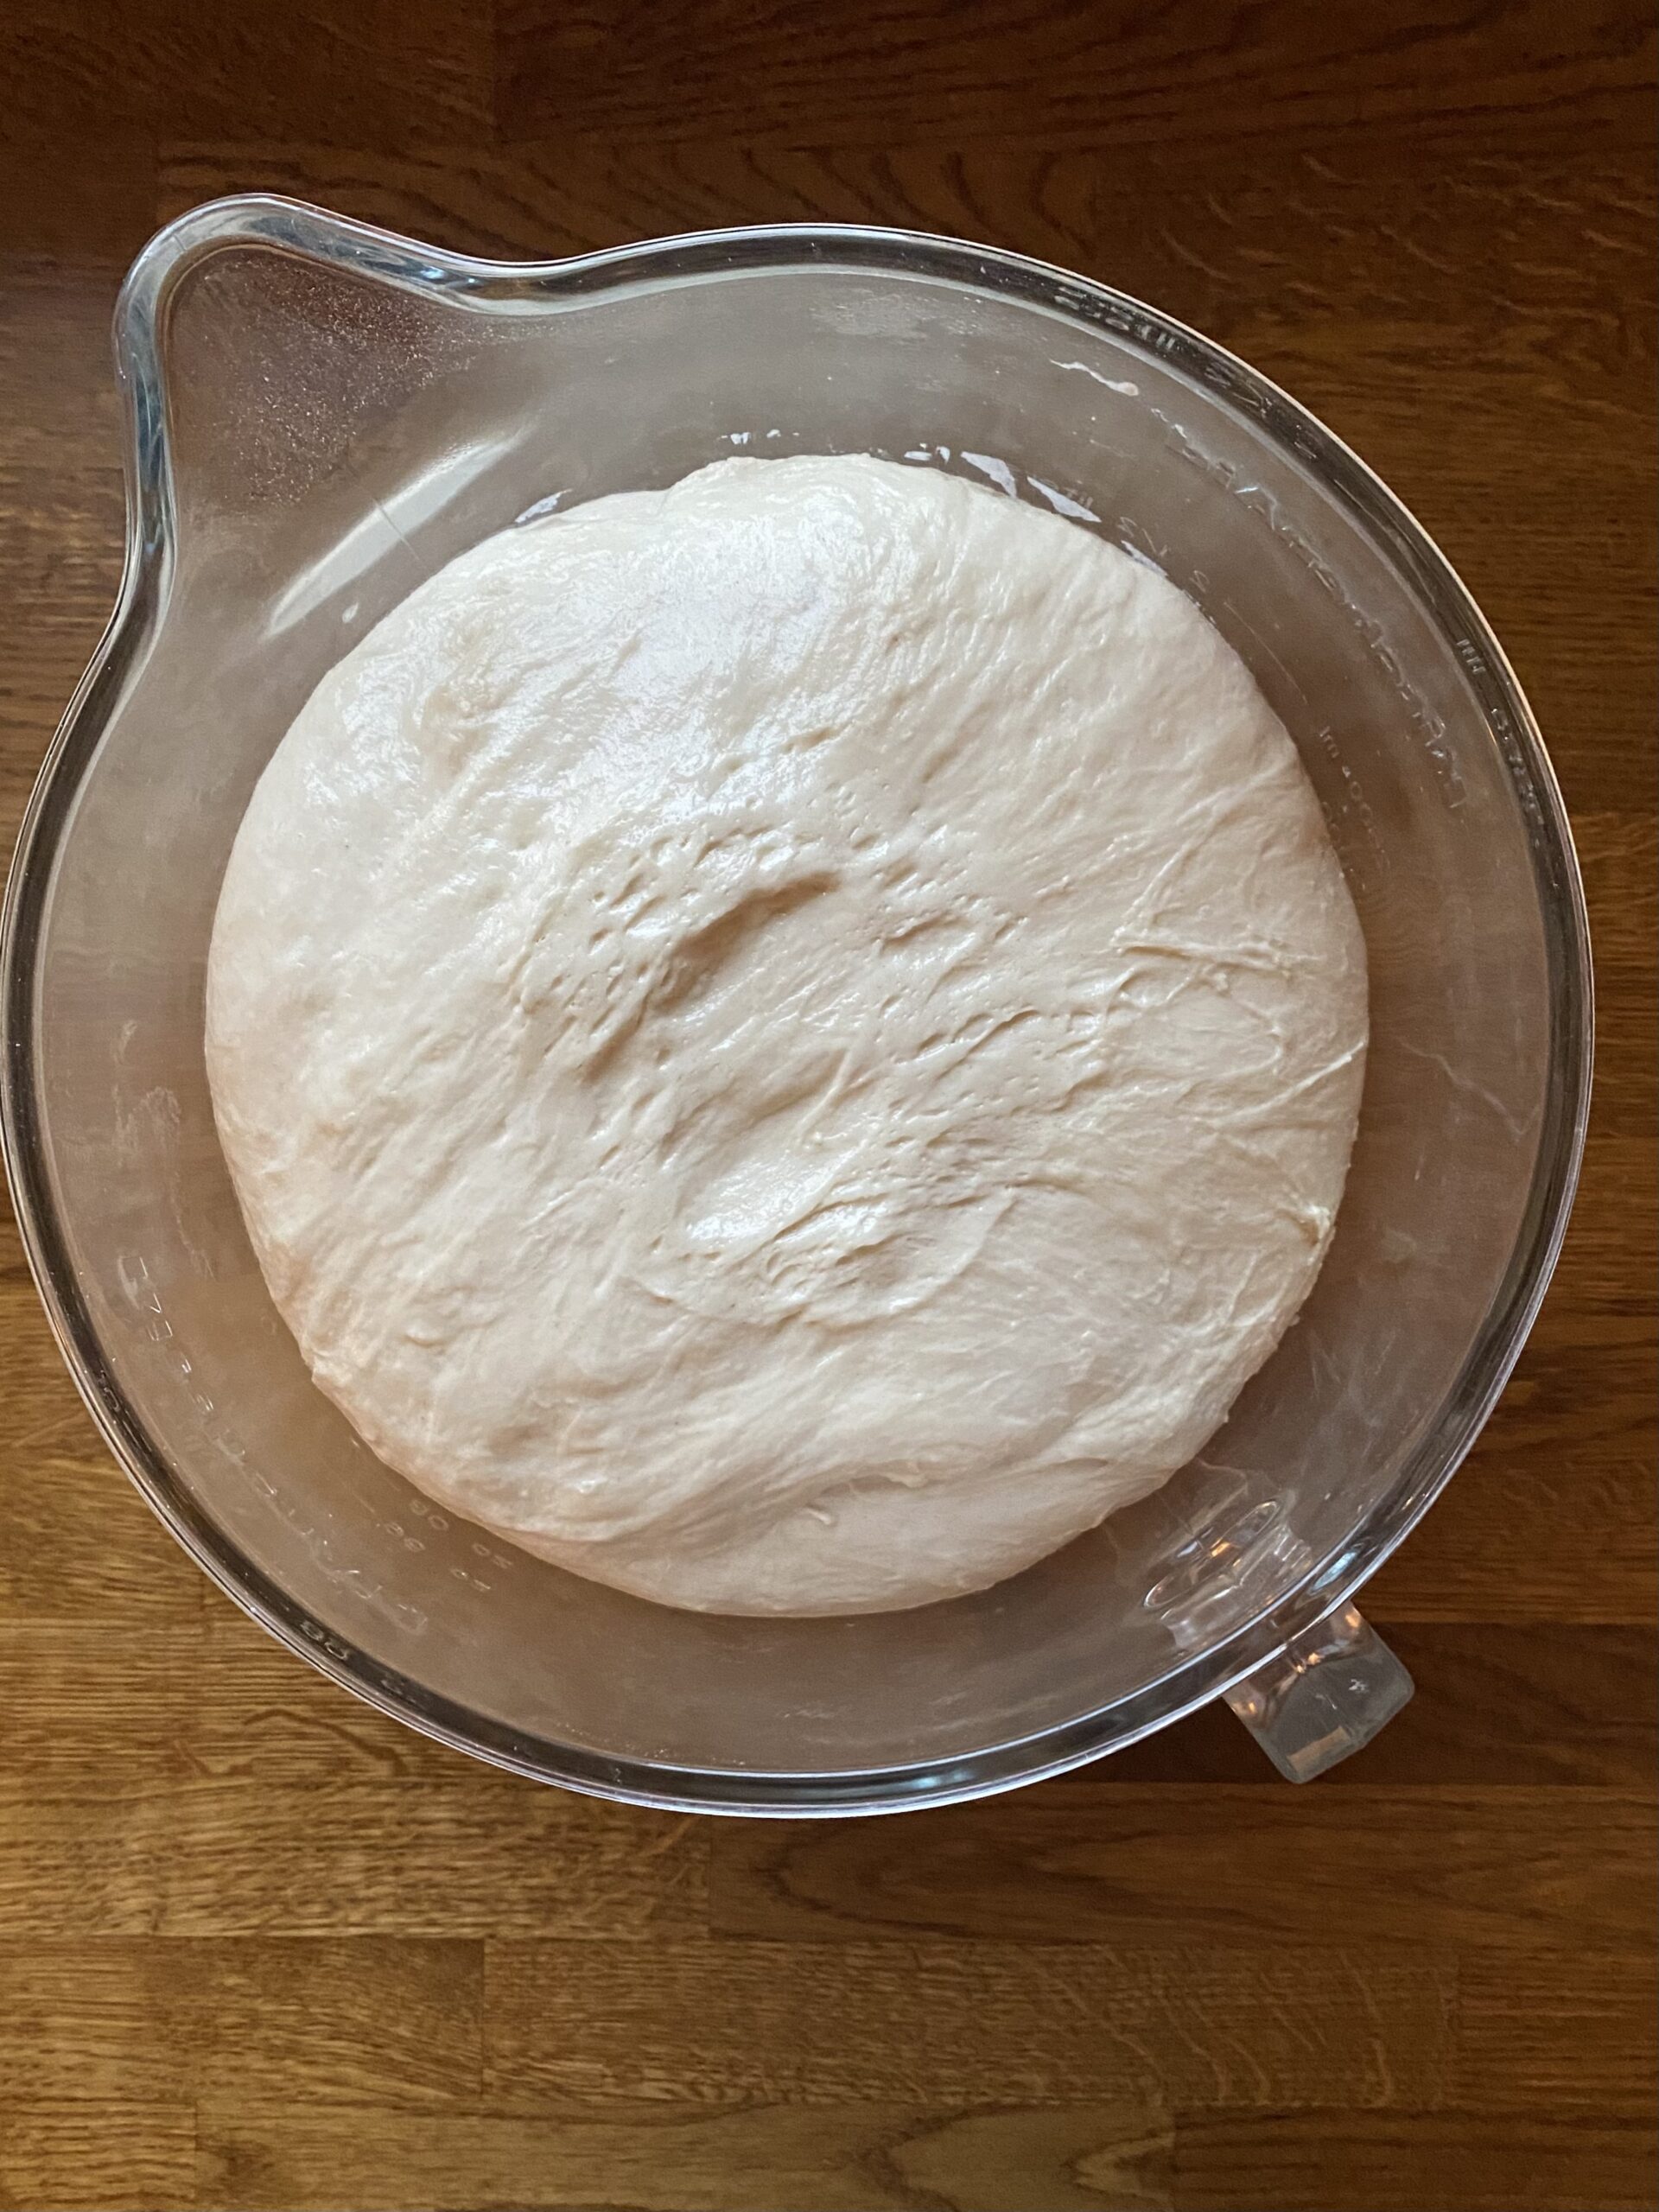
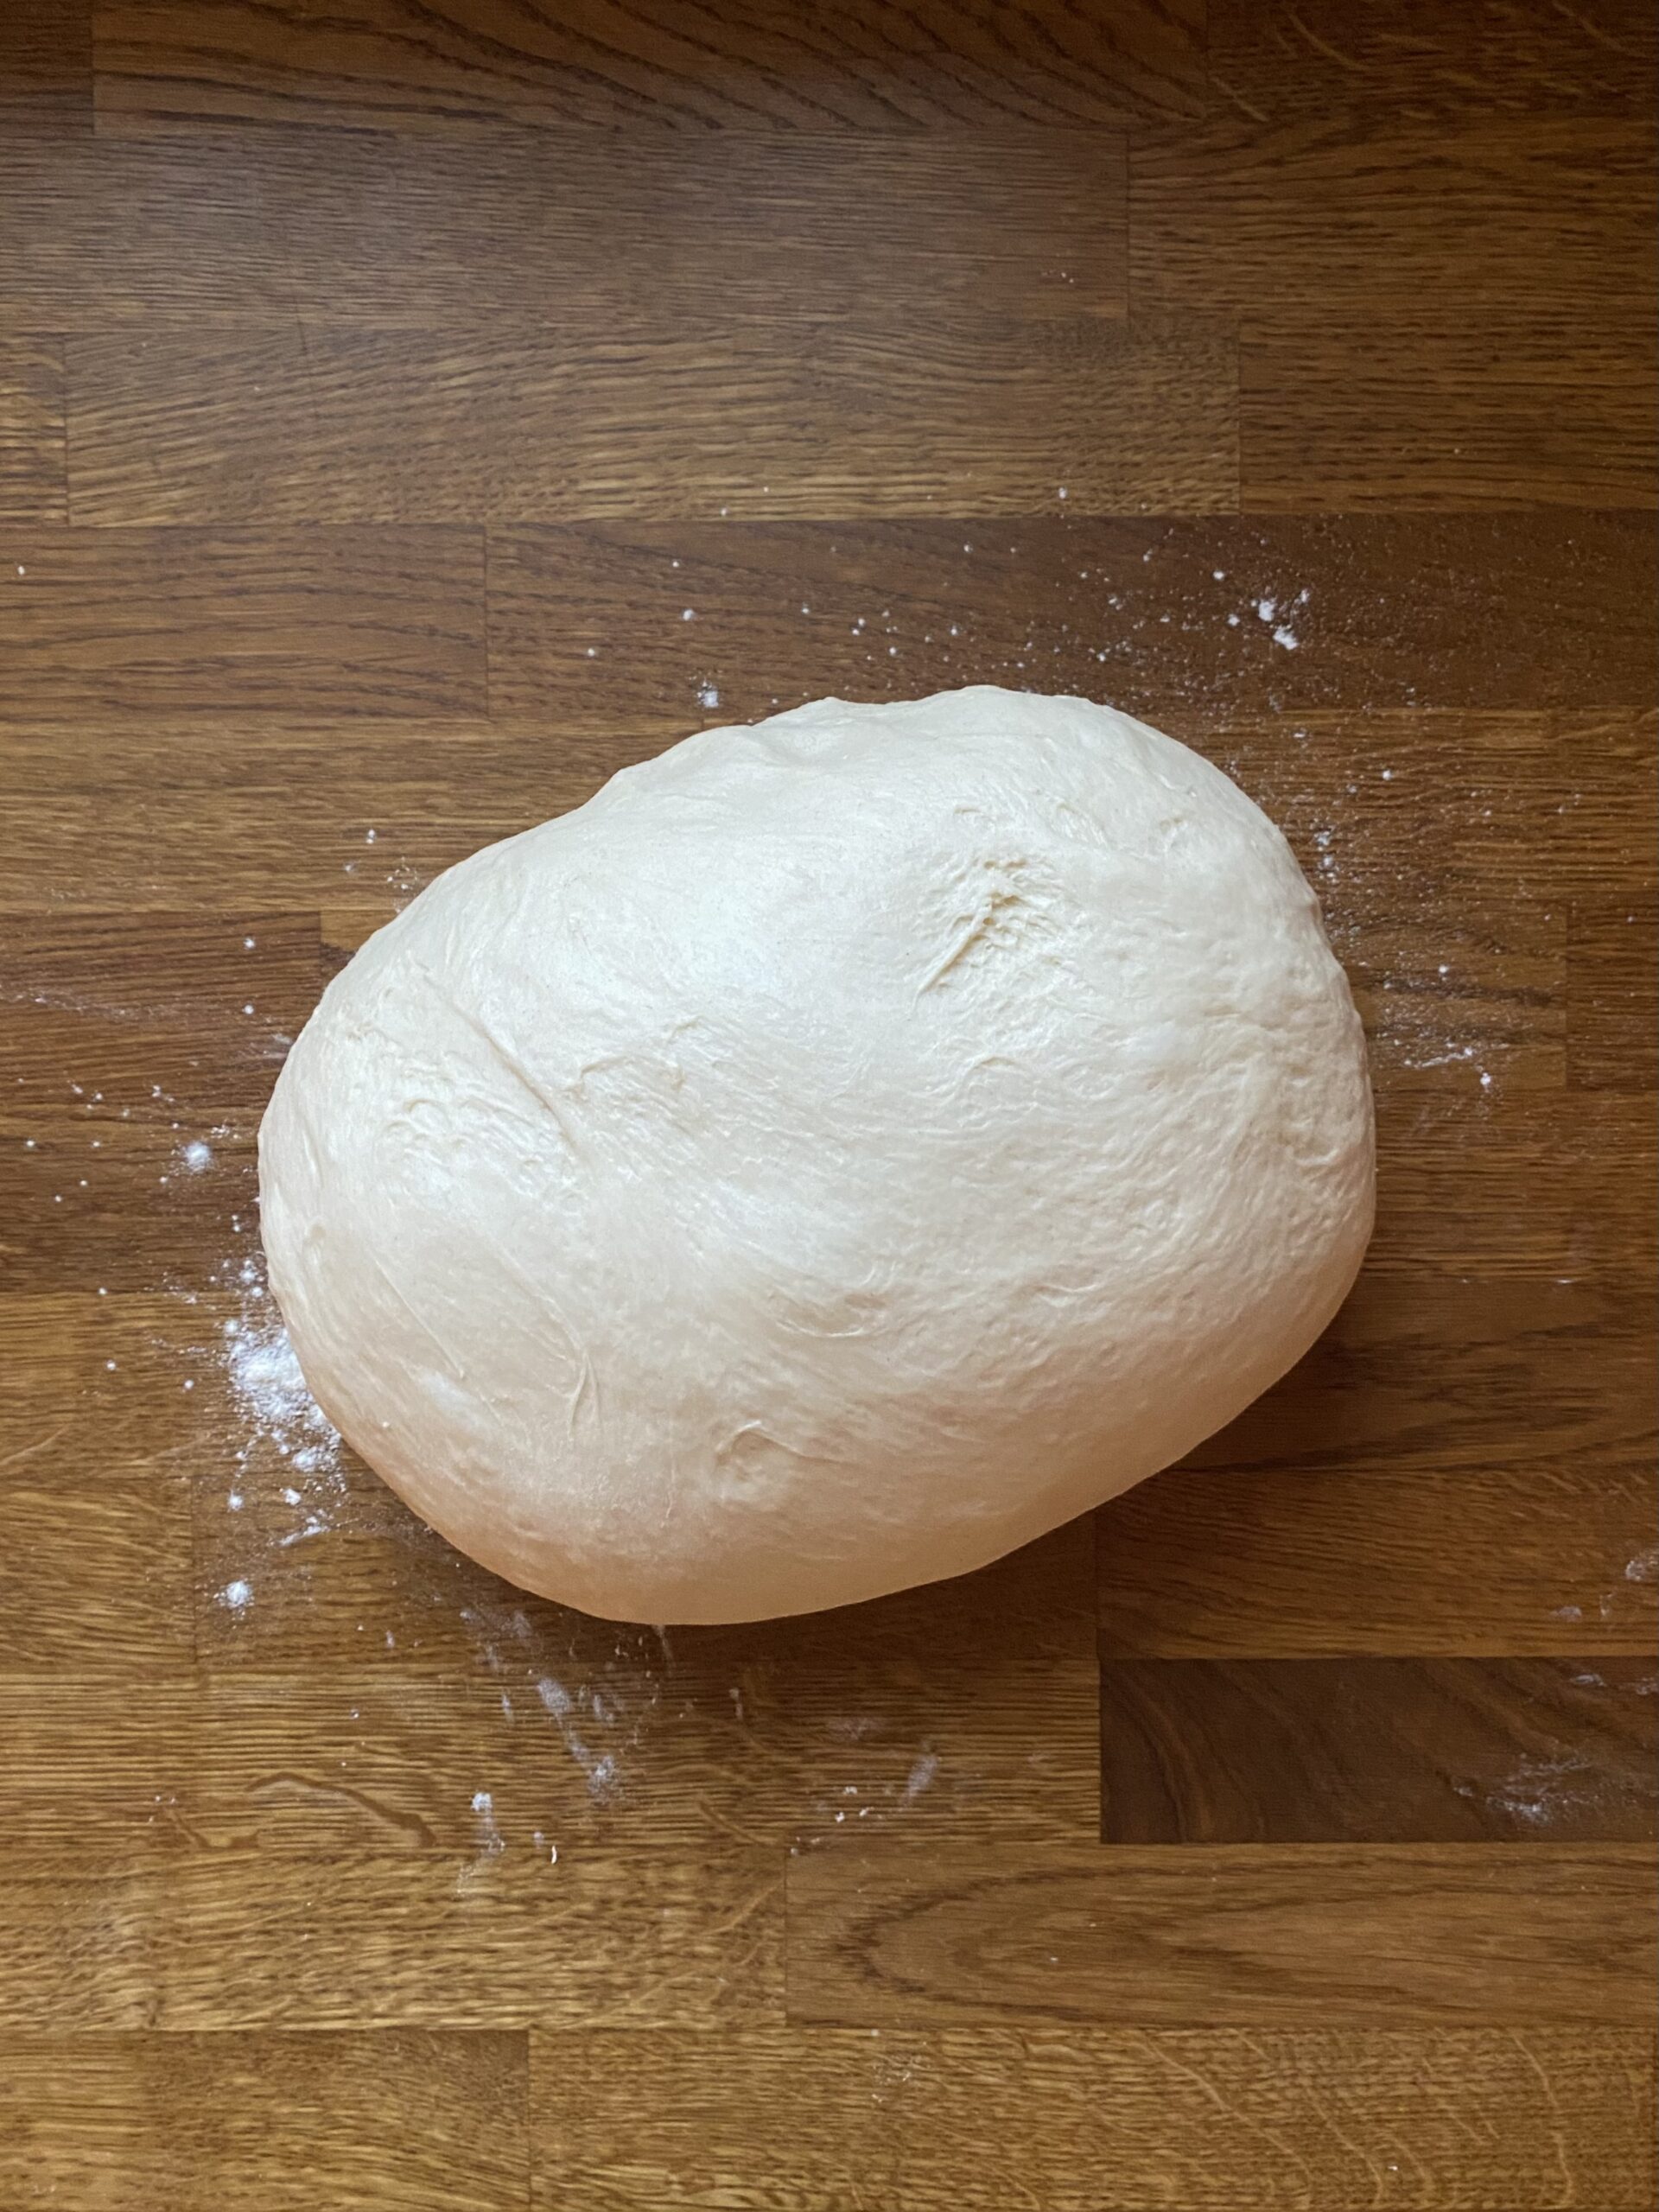
Once the dough is completely cohesive, cover it and let it rest for 45 minutes so it can begin to relax. Then, come back and do a round of stretch and folds (there won't be much stretching here, and that's okay!) to shape it into a nice ball. Cover it and let it rise until it's roughly doubled in size - about 8-12 hours.


You'll notice there is no extra kneading beyond the initial mixing. That's because I've made sourdough bagels somewhere between dozens and hundreds of times using every method known to man and I honestly couldn't tell which ones were kneaded and which ones weren't. So why go to all that effort? And why tell you to go to all that effort? Just a simple mix, a quick stretch and fold, and a long rise will give you all the gluten you need!
The ingredients
I think part of what makes homemade bagels so wonderful to make is that they require no special ingredients, but just feel like the most fun bread ever. Here's everything you will need (and I bet you probably already have it!)
- Sourdough starter - a healthy, active sourdough starter does all the leavening in this recipe.
- Brown sugar - real New York bagels use malt or malt syrup in the dough AND the water bath. This gives them a distinct, slightly molasses-y flavor. Brown sugar does the exact same job here, and since it's far easier to come by, I use it instead. It also keeps the crumb soft and improves shelf life.
- Flour - Bread flour is preferable for a super chewy bagel, but all purpose most definitely works too. I use whichever one is in my kitchen and doesn't require me to go to the basement to get more. Just keep in mind that the dough will be slightly stickier if you use all purpose.
- Salt - Never, ever, ever forget it!
- Water - Of course!
Shaping bagels
This is so extremely fun to do. If you've never done it, you will love it!
Bagels are a treat because, again, the dough sticks to nothing. It's like working with play-doh. Except bagels are 100x more delicious (unless you ask my second born, a habitual play-doh eater).
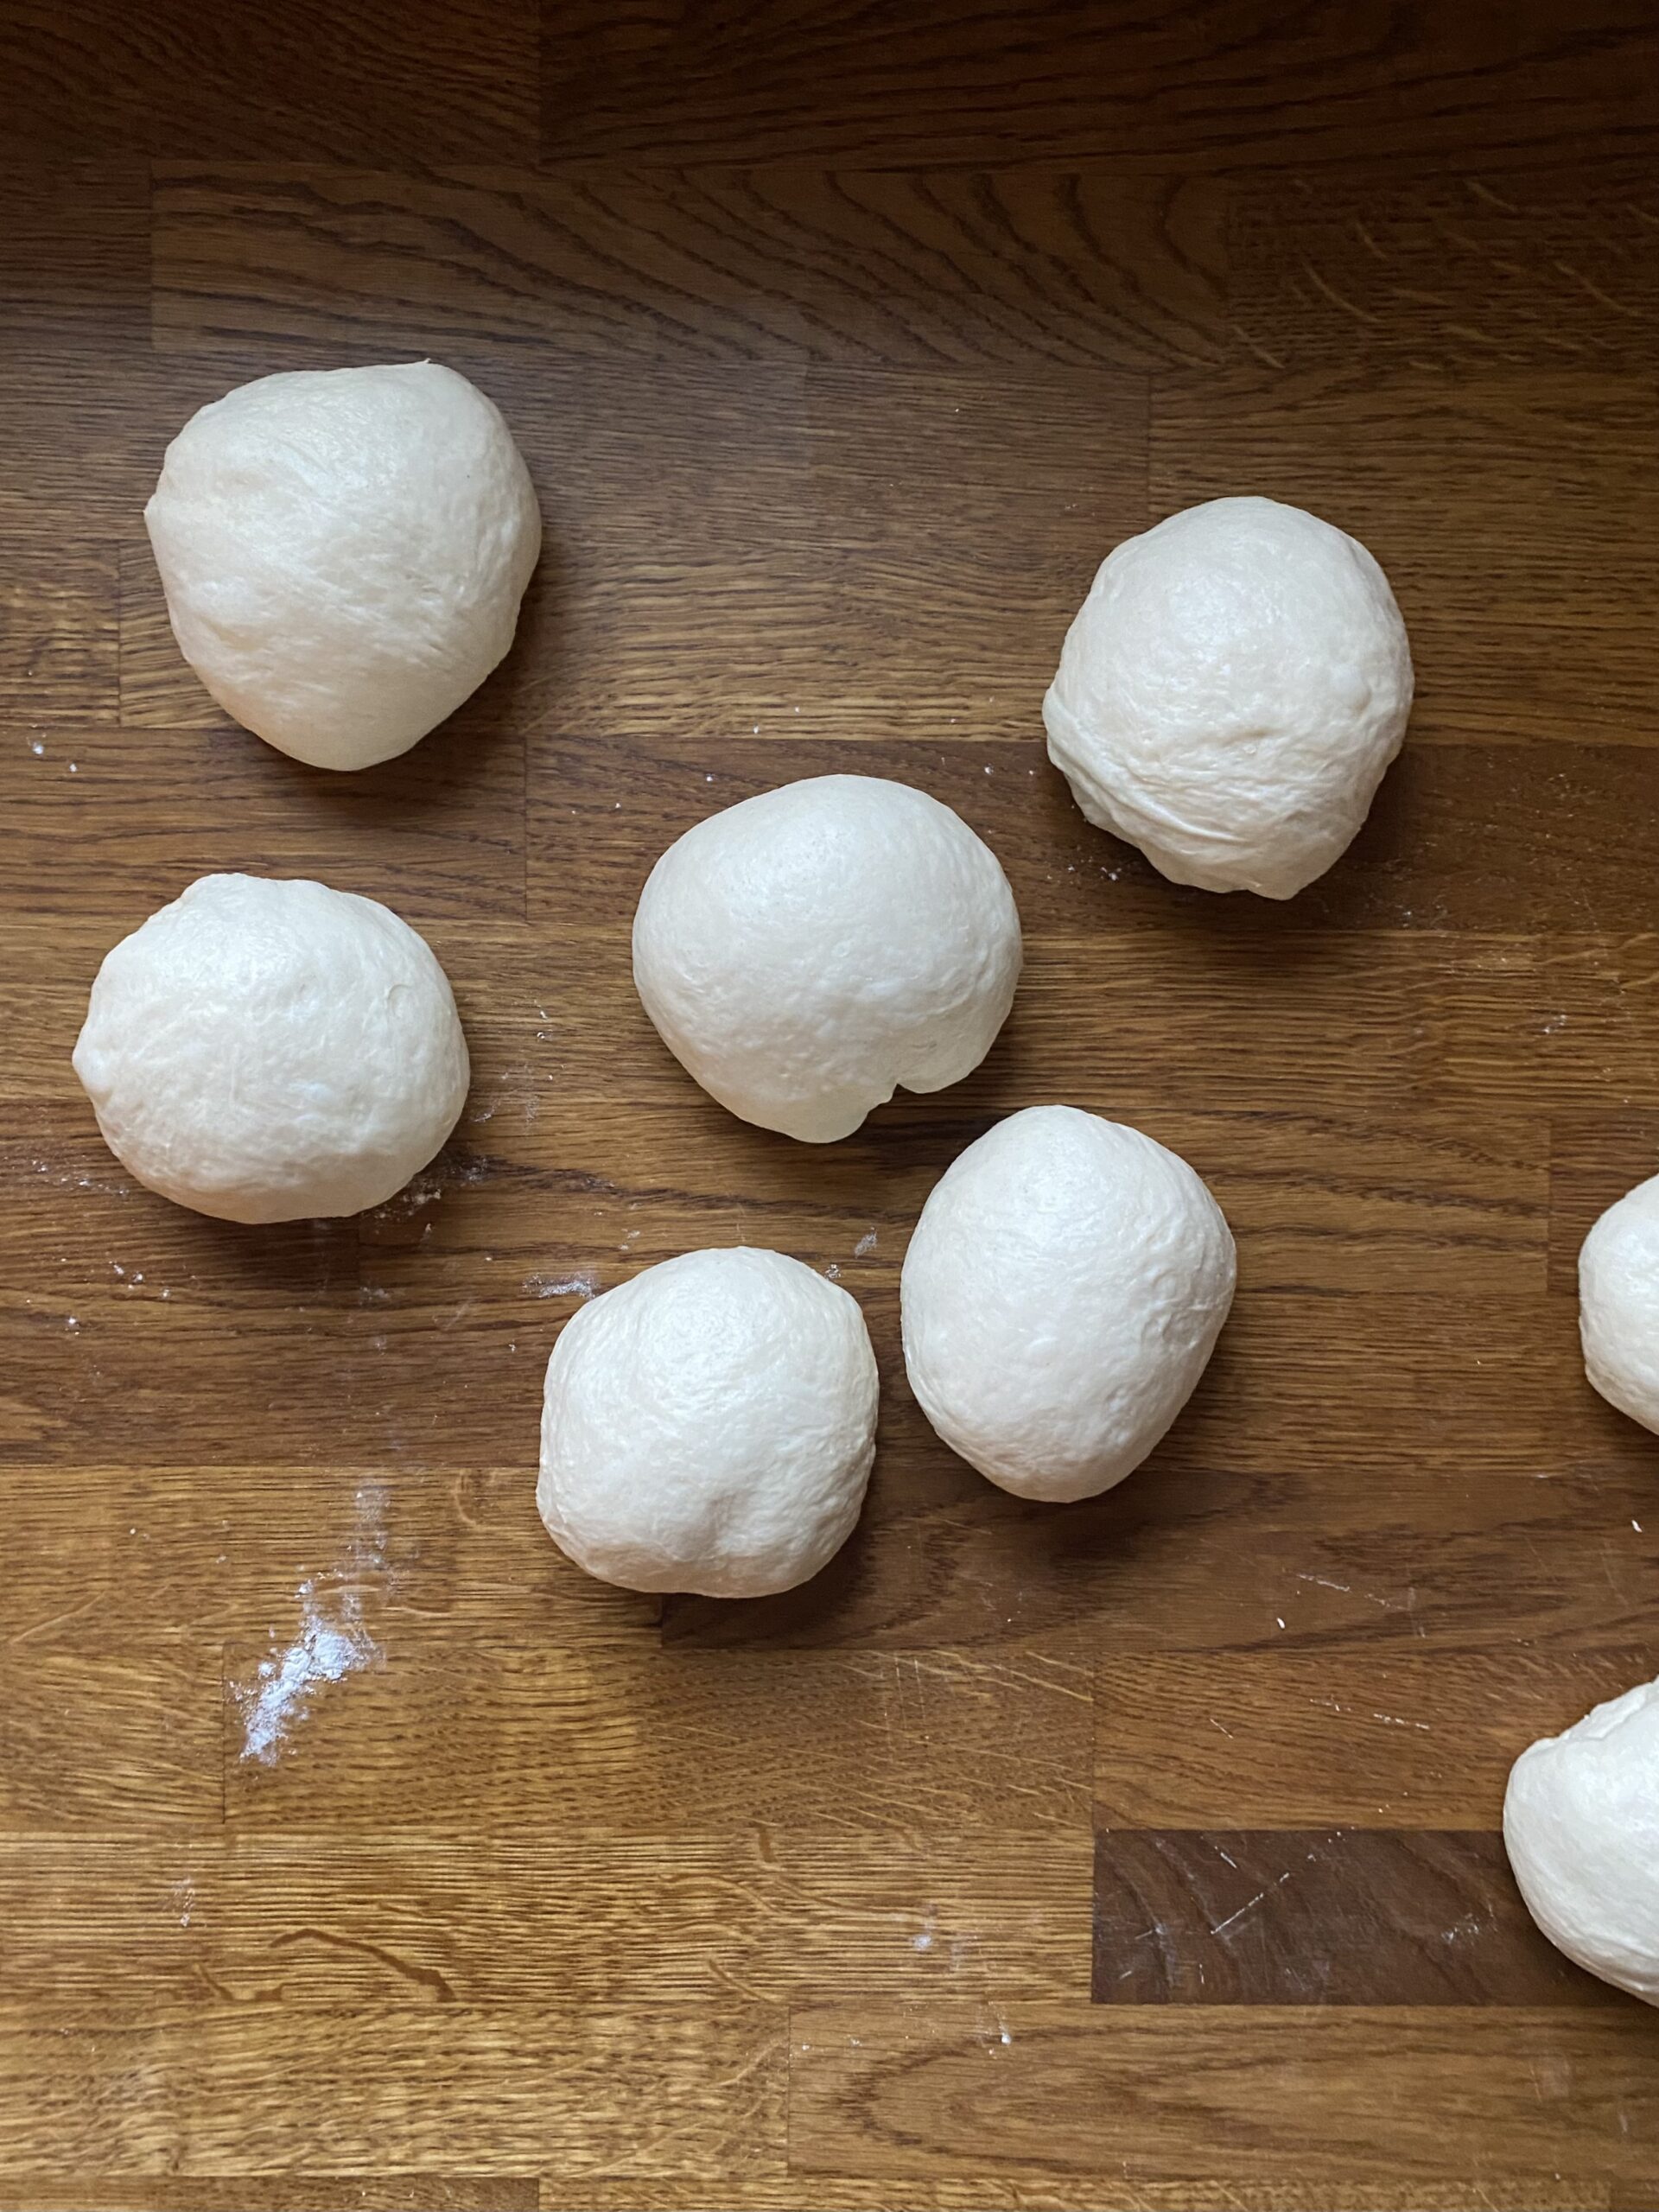
I'm giving you some shaping options because different people find different methods easier! No matter which method you use, you'll start by deflating your dough a VERY lightly floured surface and dividing it into 12 pieces. This is a rare recipe where I actually use my scale to weigh dough pieces - each should be about 150 grams.

Shaping method 1: the ball
An easy, straightforward method that delivers consistent results and is great for beginners.
For this method, you'll shape each piece of dough into a ball, then use a finger to torpedo a hole into the middle and barrel roll the dough using two pointer fingers to stretch the hole out.
It's important with this method to let the balls of dough rest (covered) for 15-30 minutes. This step is important to allow the gluten to relax - otherwise, the dough won't stretch well and you'll end up tearing the gluten strands (not good!).

Shaping method 2: the worm
This is faster once you get the hang of it, and is how I've seen every big time bagel shop do it. I will say this method is easier to mess up, so I would only use it if you feel very confident with your dough shaping skills or you want a challenge!
Once your dough is divided, roll a piece into an 8-inch long worm, wrap it around the top of the palm of your dominant hand, overlapping the edges by 2 inches on the front of your hand, then roll it quickly and firmly against your countertop to seal.
Tips for success, no matter which method you use
- Be sure to keep the pieces of dough you're not currently working with covered - this dough tends to dry out quickly.
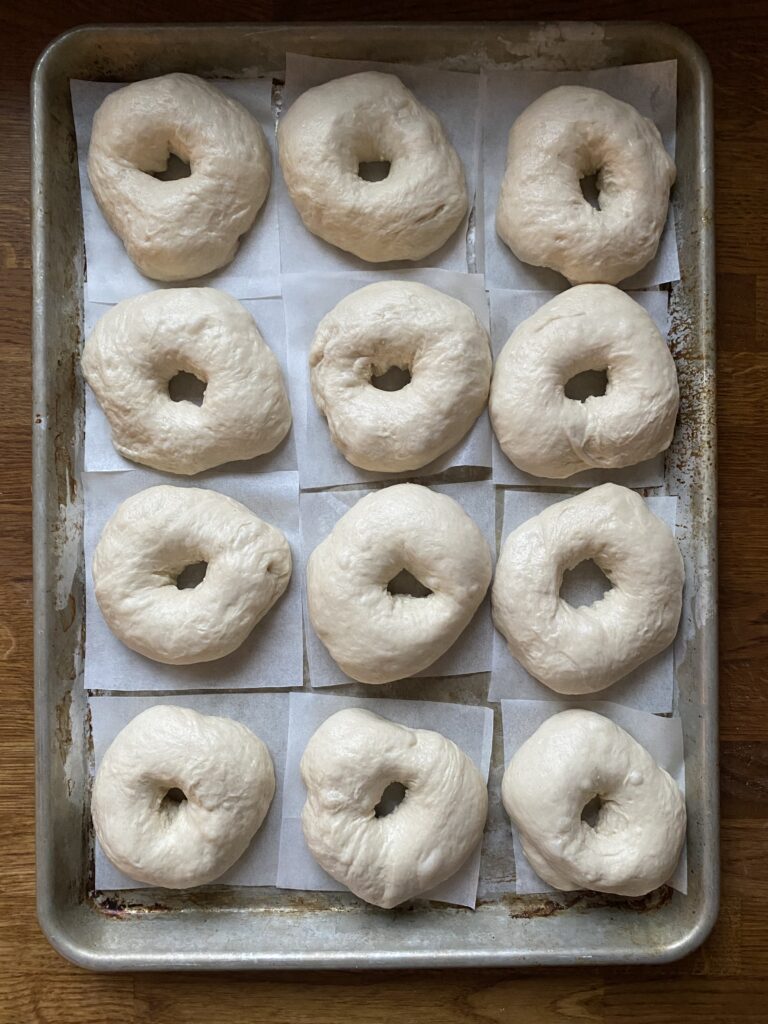
- Cut a sheet of parchment paper into 12 squares and place your shaped bagels onto those to rise. When it's time for their water bath, you can put the whole thing - parchment paper and all - into the bath. This makes the transfer way easier! Remove parchment paper with tongs when the bagels are boiling - it will peel right off. You can even dry the pieces and reuse them for future bagels!
- Make the bagel holes about 2x larger than you think they need to be. They will shrink during the second rise and baking.
The second rise
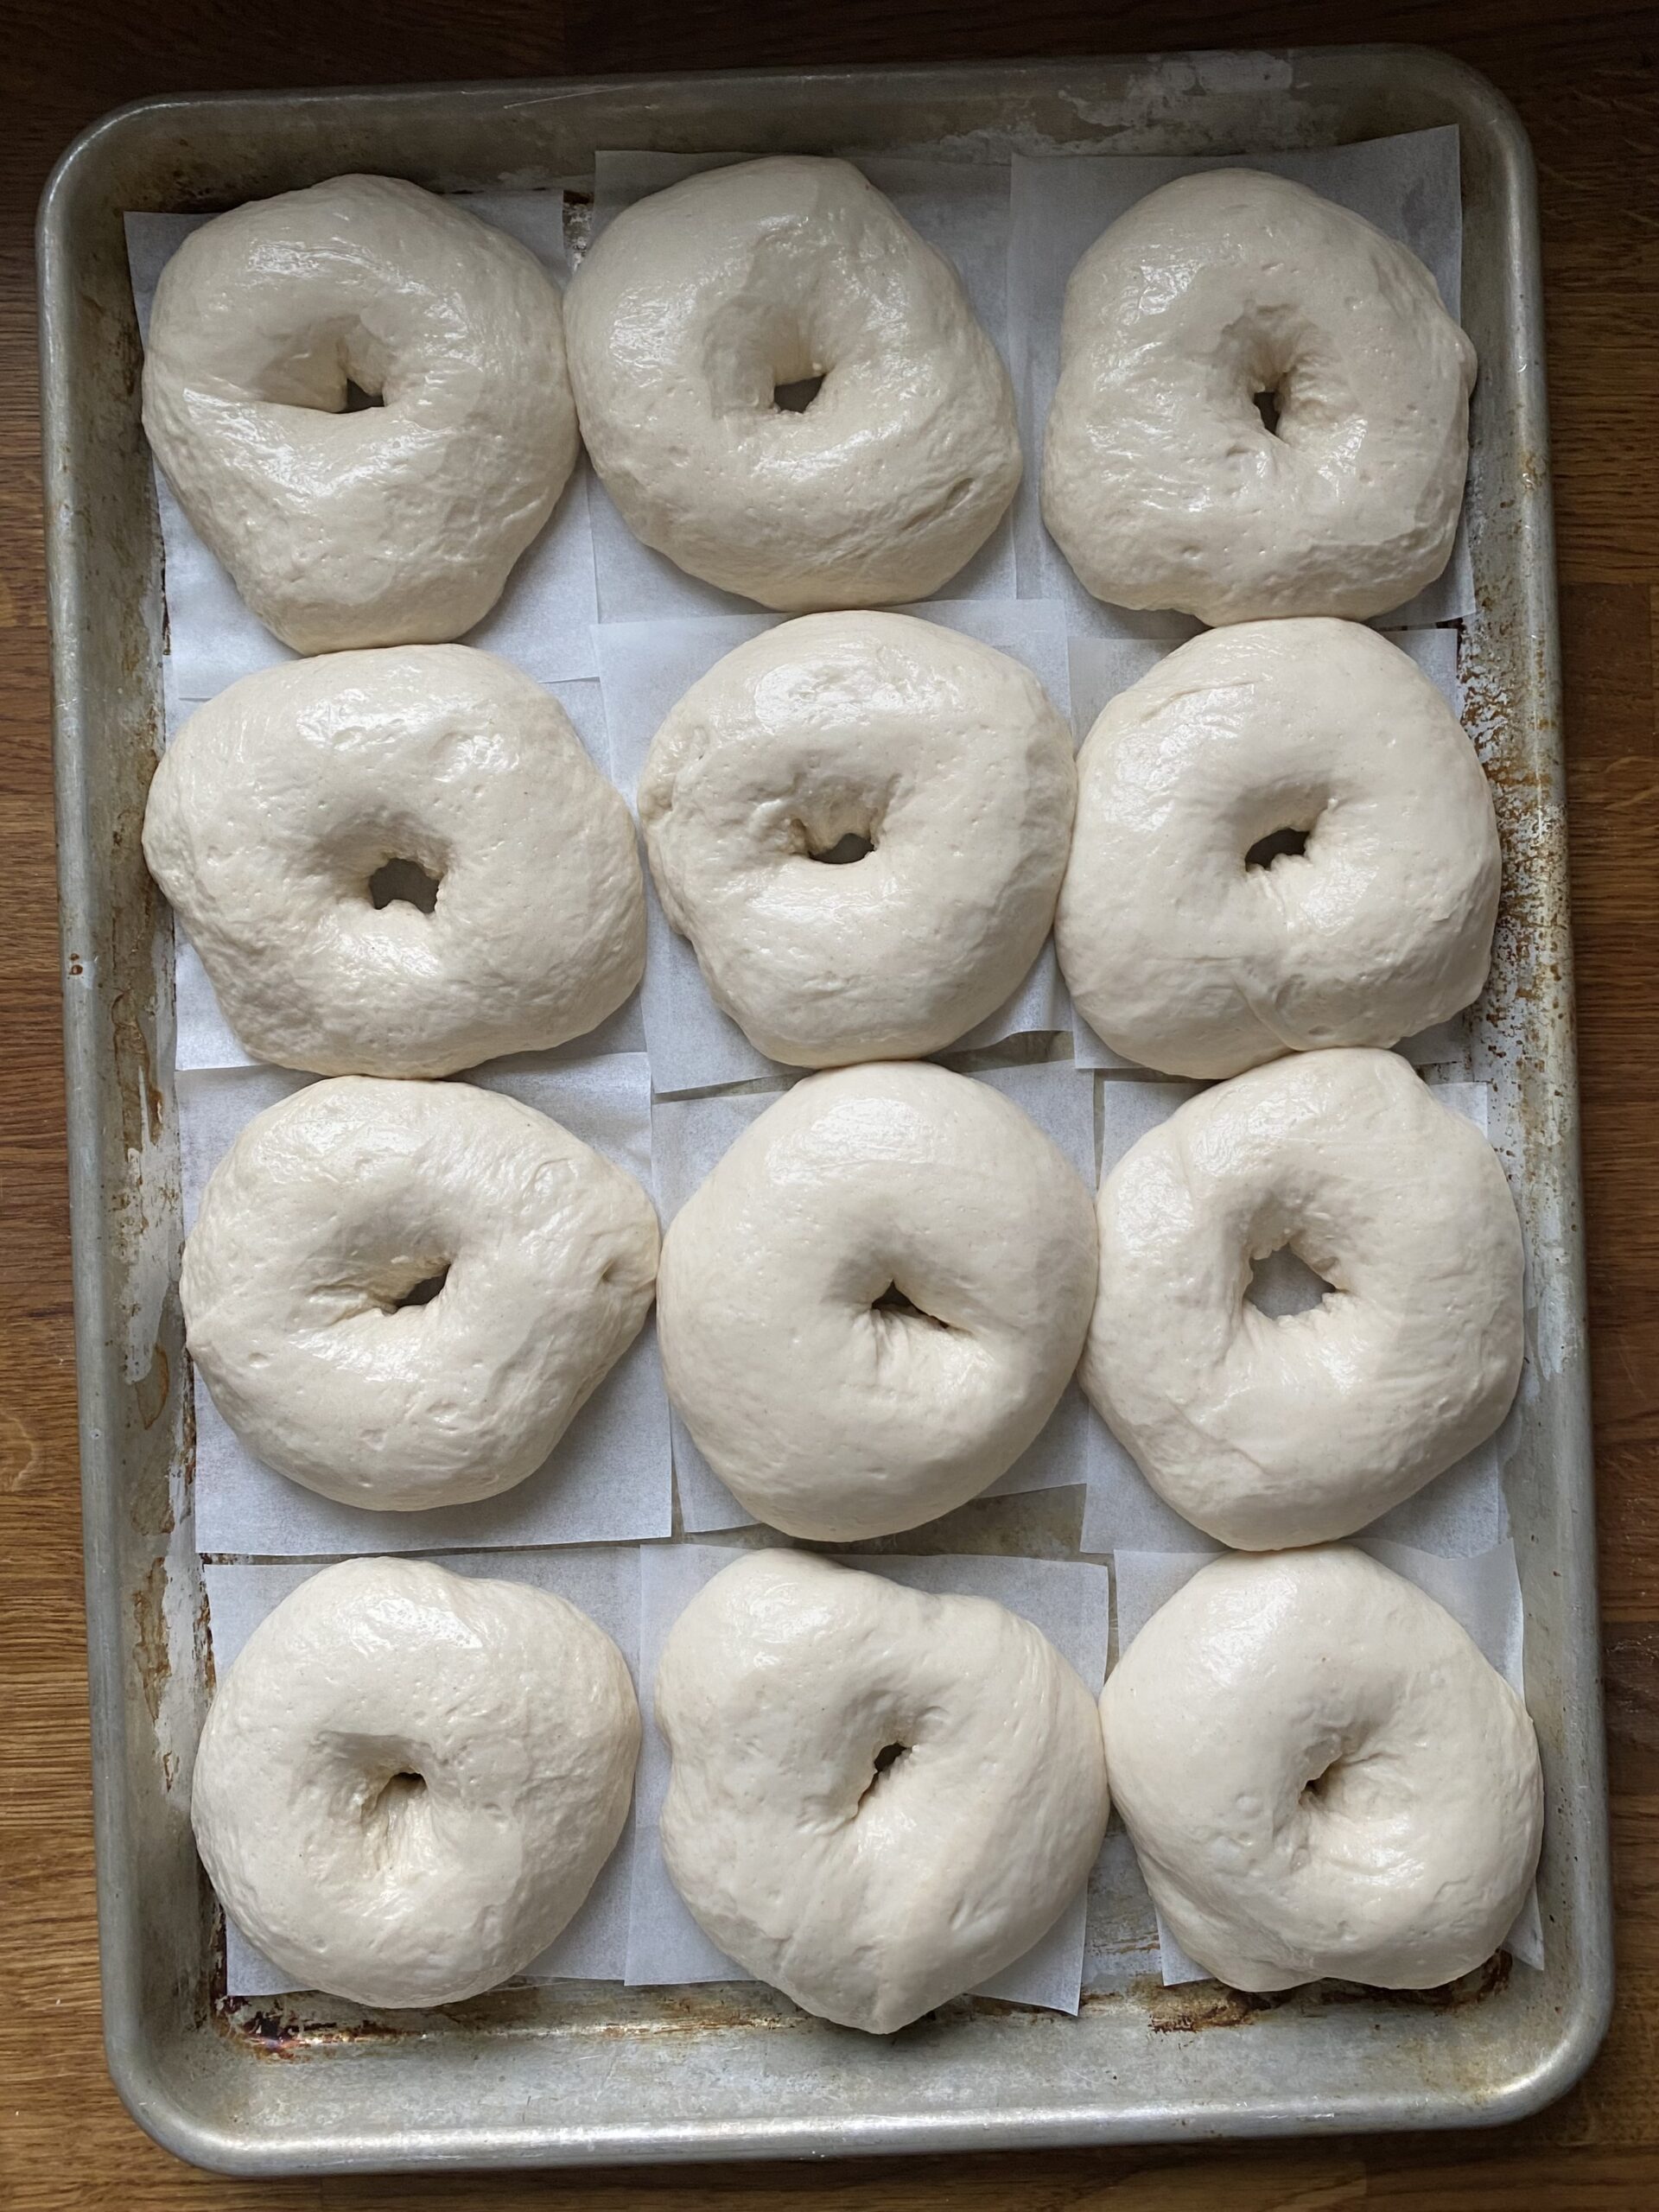
The second rise is every bit as important as the first here. The bagels will puff up dramatically, giving you gargantuan bagels.
You can do this at room temperature, which takes 2-3 hours, or overnight in the fridge.
No matter where you do the second rise, make sure the bagels are covered VERY well so they don't dry out.
The water bath
One essential step that makes bagels distinct is that they're boiled before baking. This gives them their soft, chewy, shiny crust.
BUT, don't use just water - add in some baking soda and honey or brown sugar for the best results.
- Baking soda - mimics the lye used by bagel shops. This gives the bagels flavor, color, and shine. (This is also used for making pretzels.)
- Honey/brown sugar - mimics the malt used by bagel shops. A sweetener helps give the bagels color and shine, and helps toppings to stick. Honey is what's typically used in home applications, but I tend to prefer brown sugar. Either will work!
I've found 30 seconds to be the perfect length for bagel boiling, flipping them halfway through. The crust will be soft (not tough!) and the interior texture will be just right.
This means the boiling step goes fast, so have all your baking sheets set up and ready to go before you start!
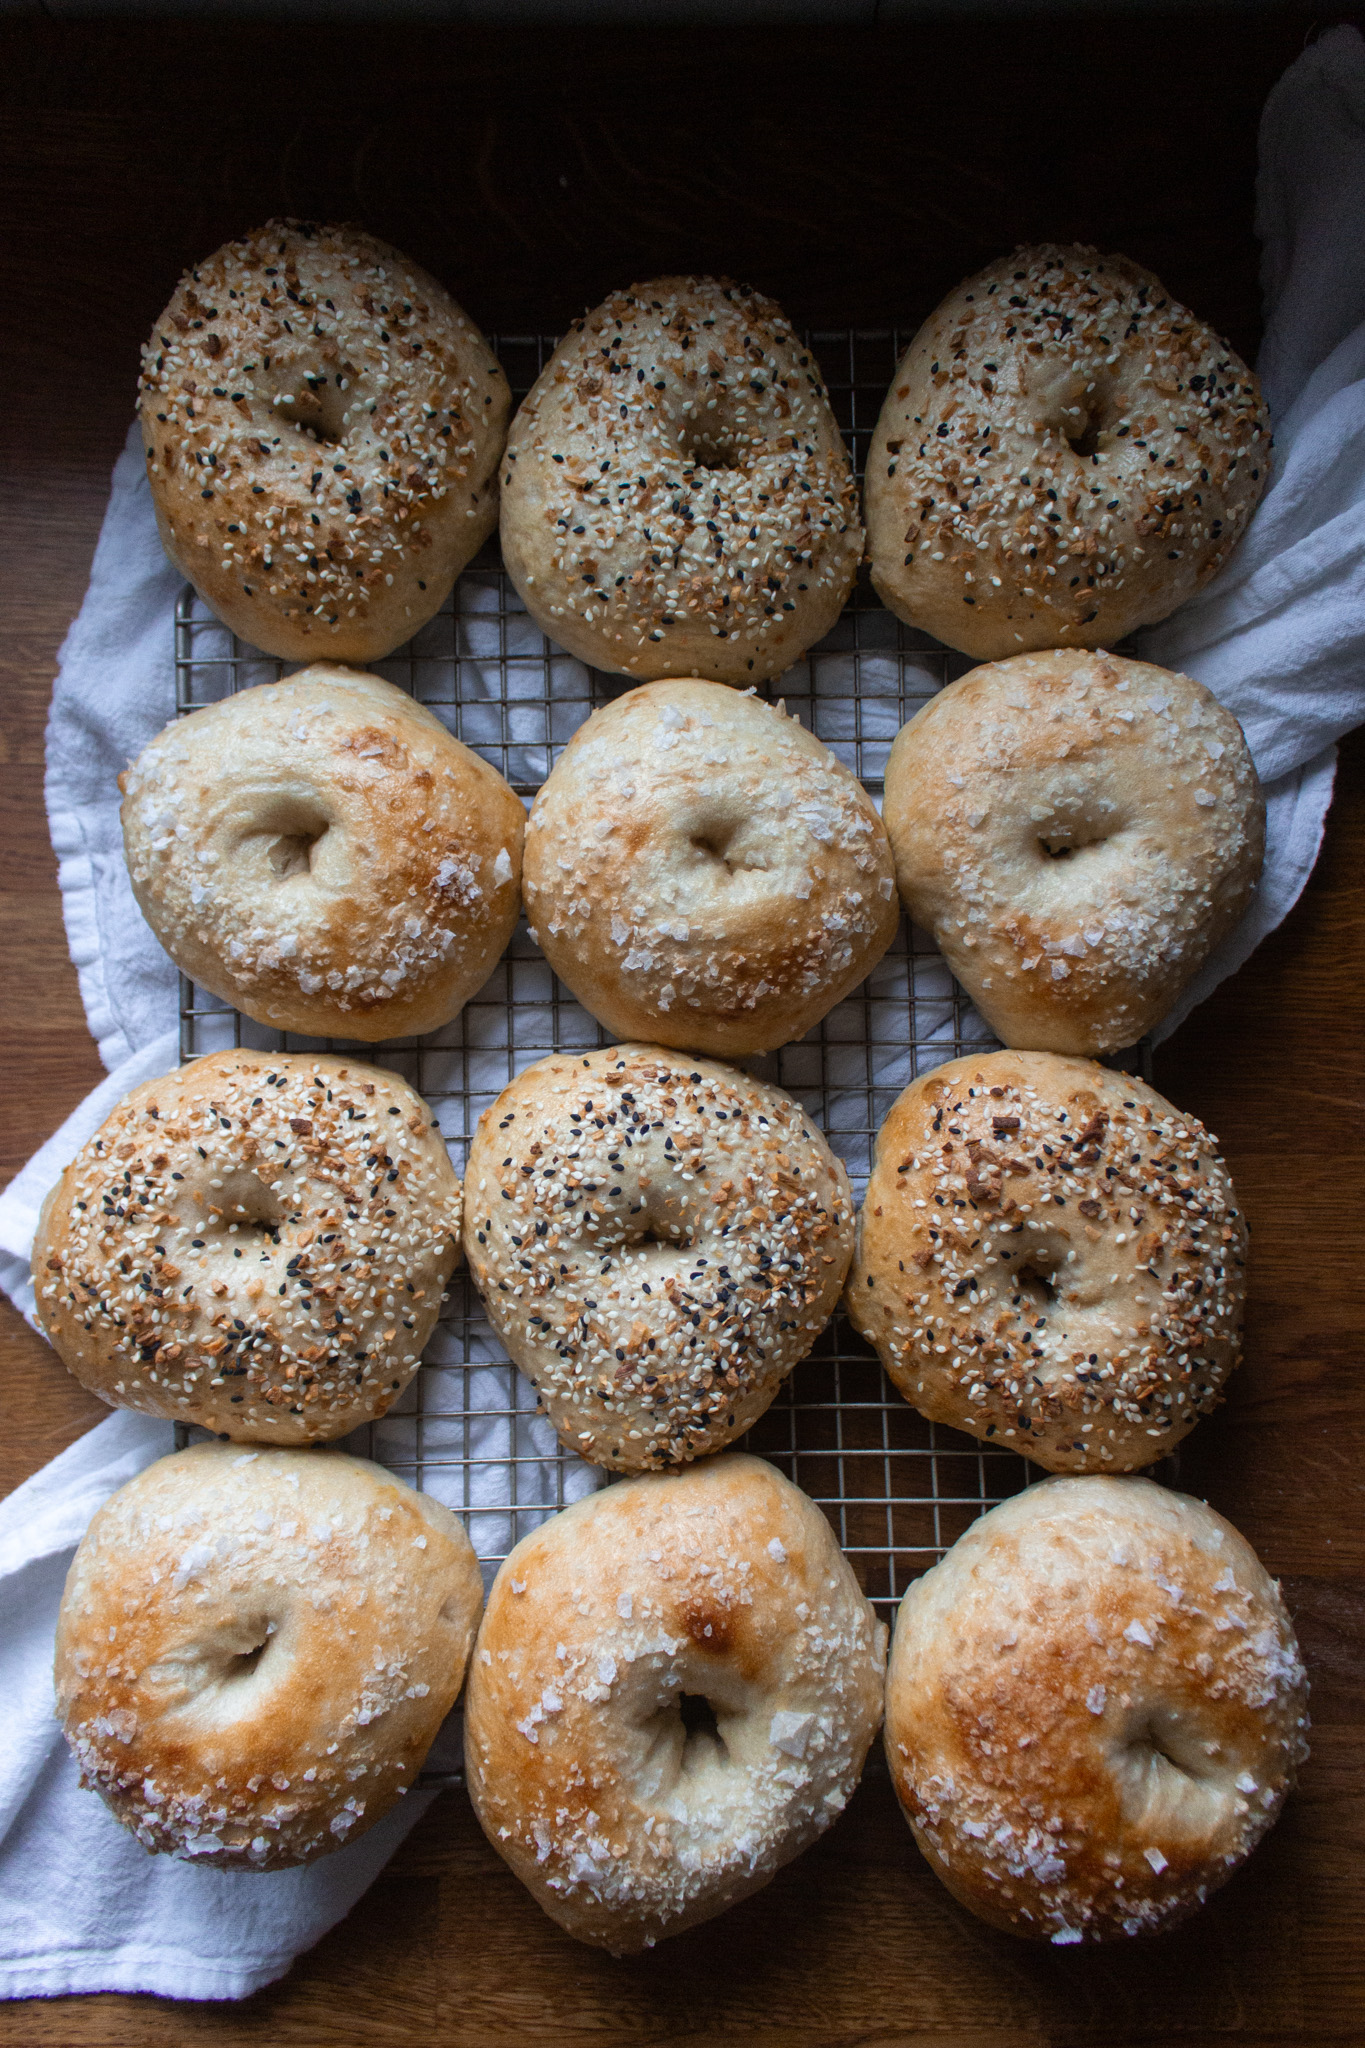
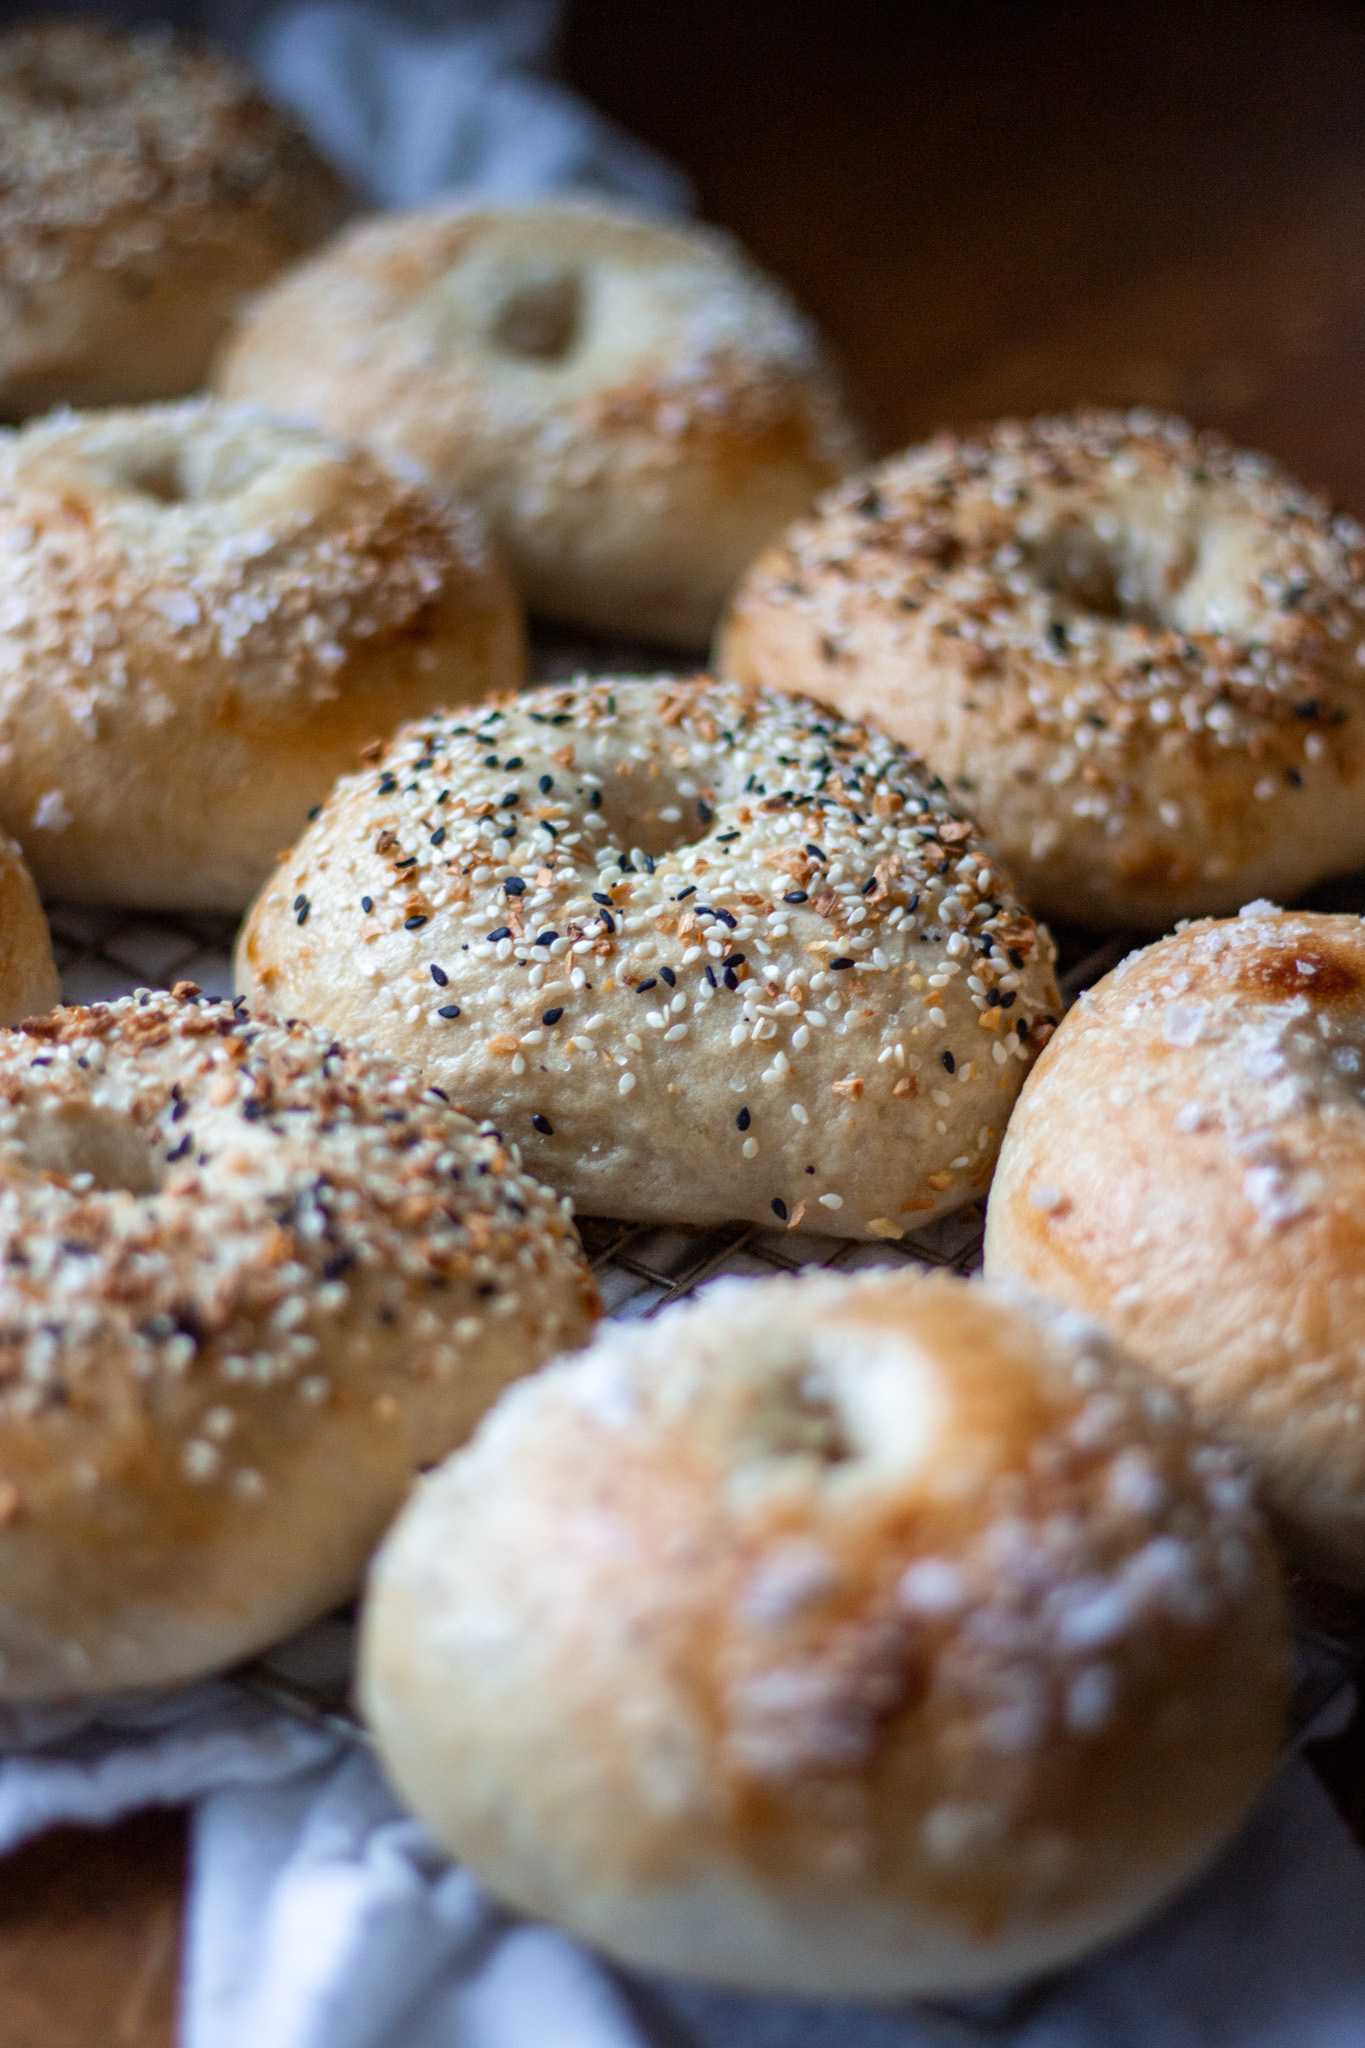
The toppings
Maybe the best part of making homemade bagels is you can do whatever toppings you want, and in any amount!
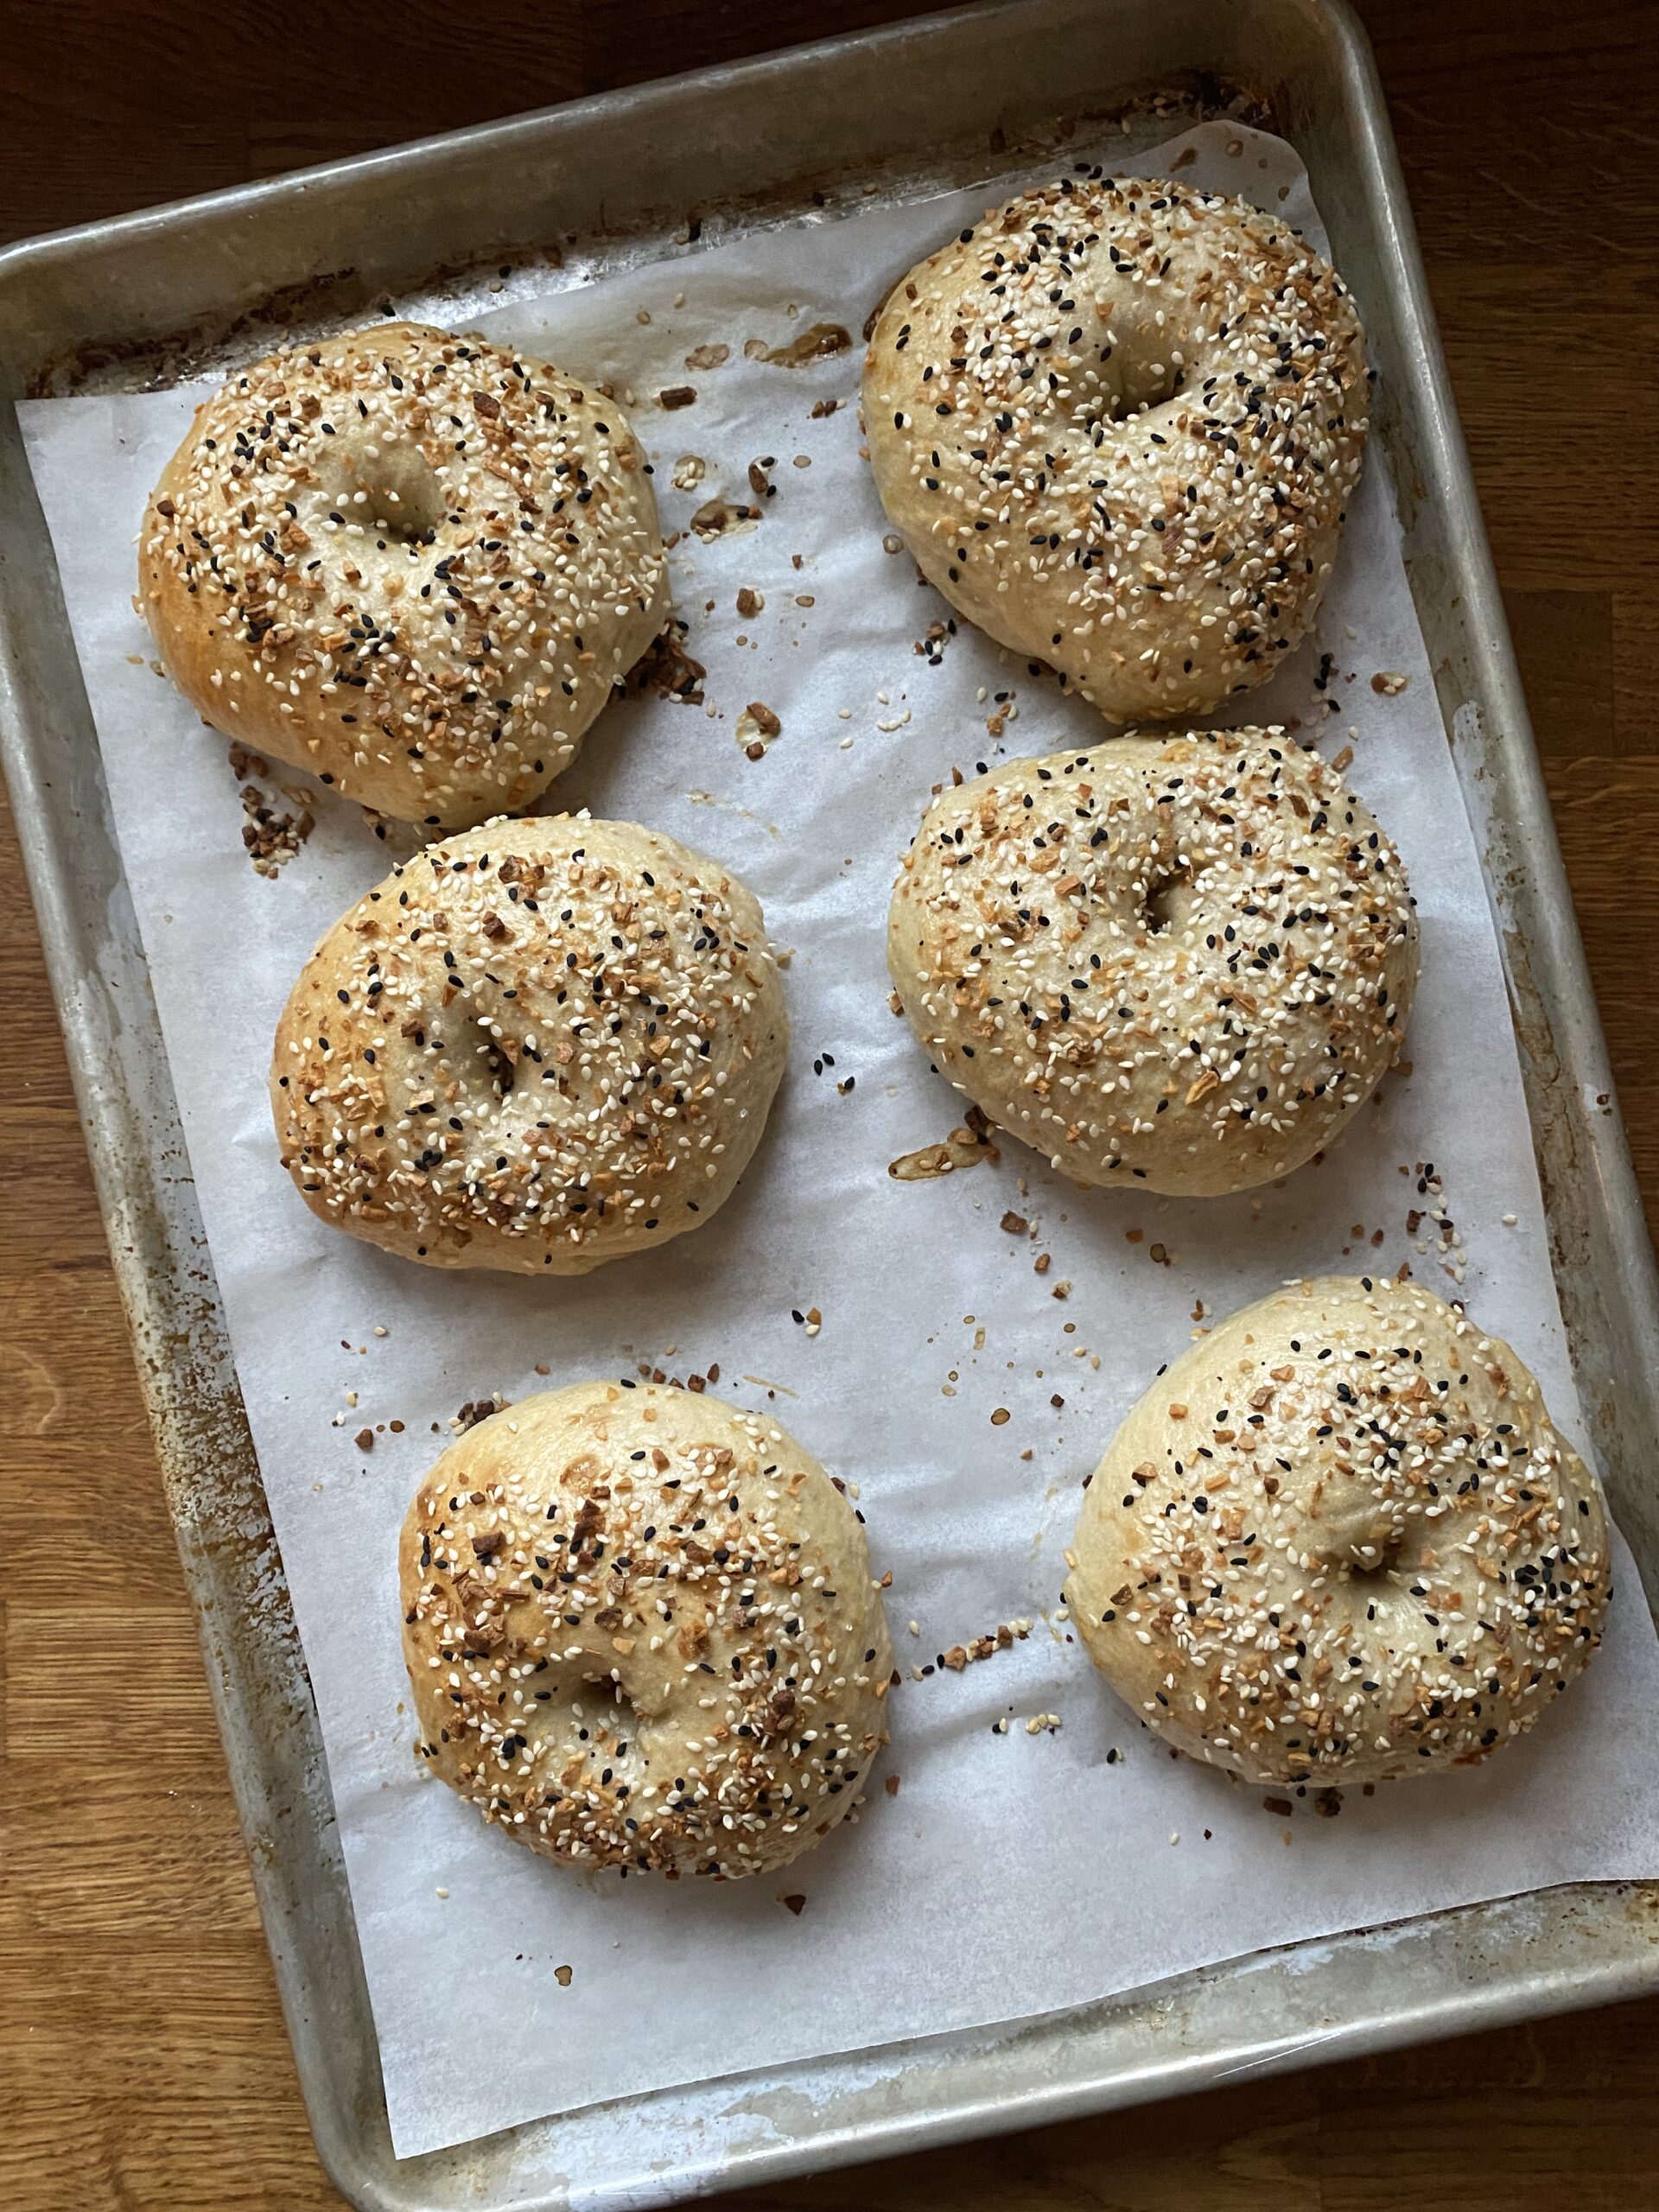
After the bagels are boiled, you'll brush them with an egg wash (if the toppings require it), and put on whatever toppings you want.
Toppings you should definitely try:
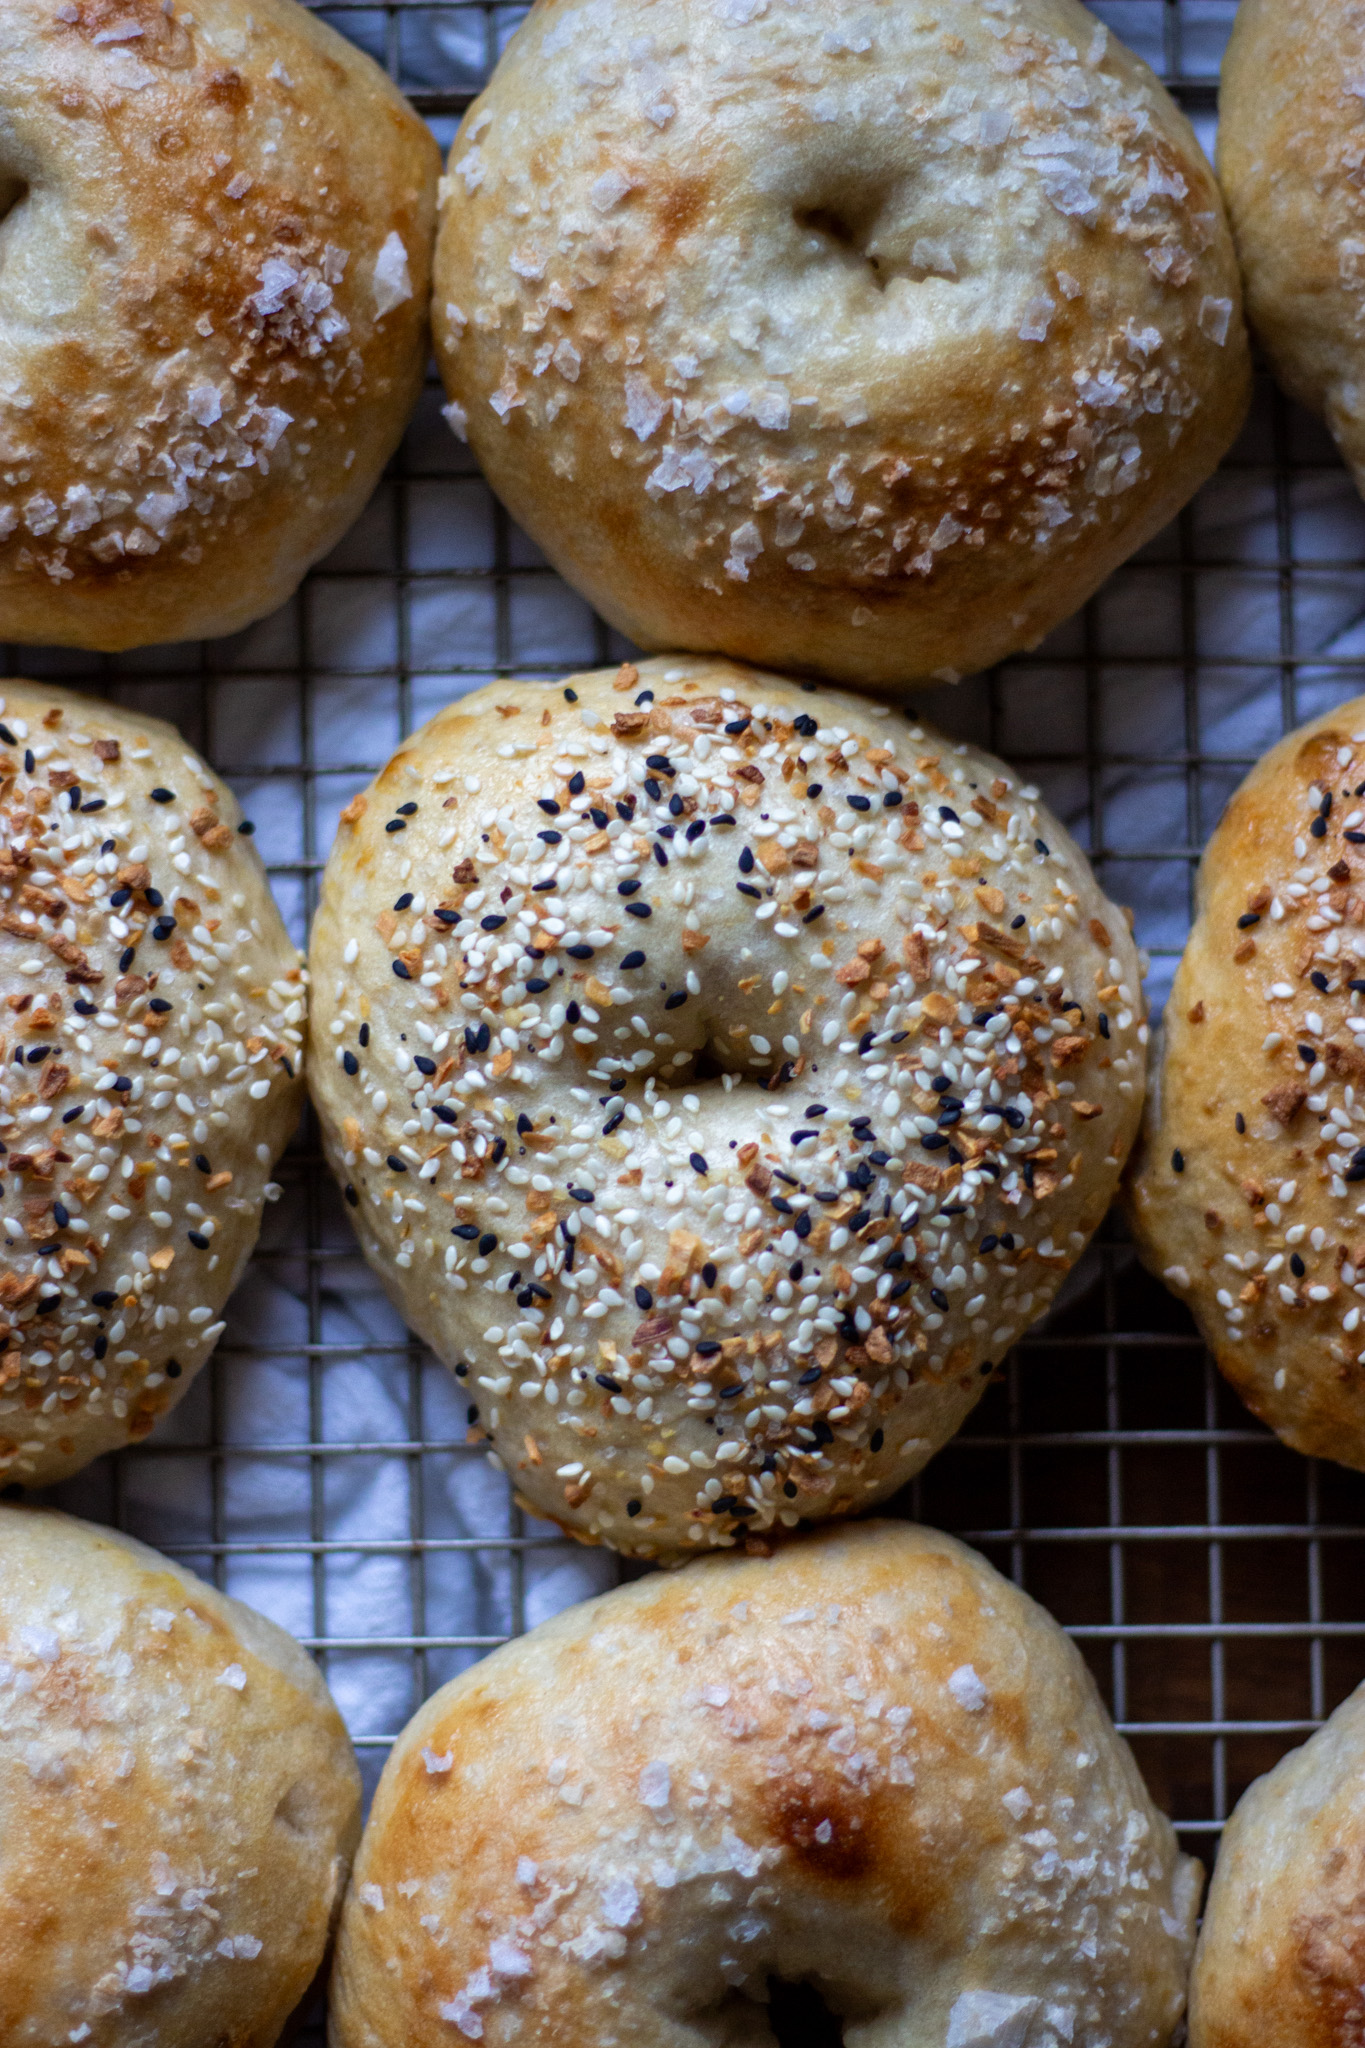
- Everything bagel seasoning - This is really easy to find now - I think every grocery store has their own blend. Honorable mention to Aldi and Trader Joes for having the best ones!
- Sesame seeds
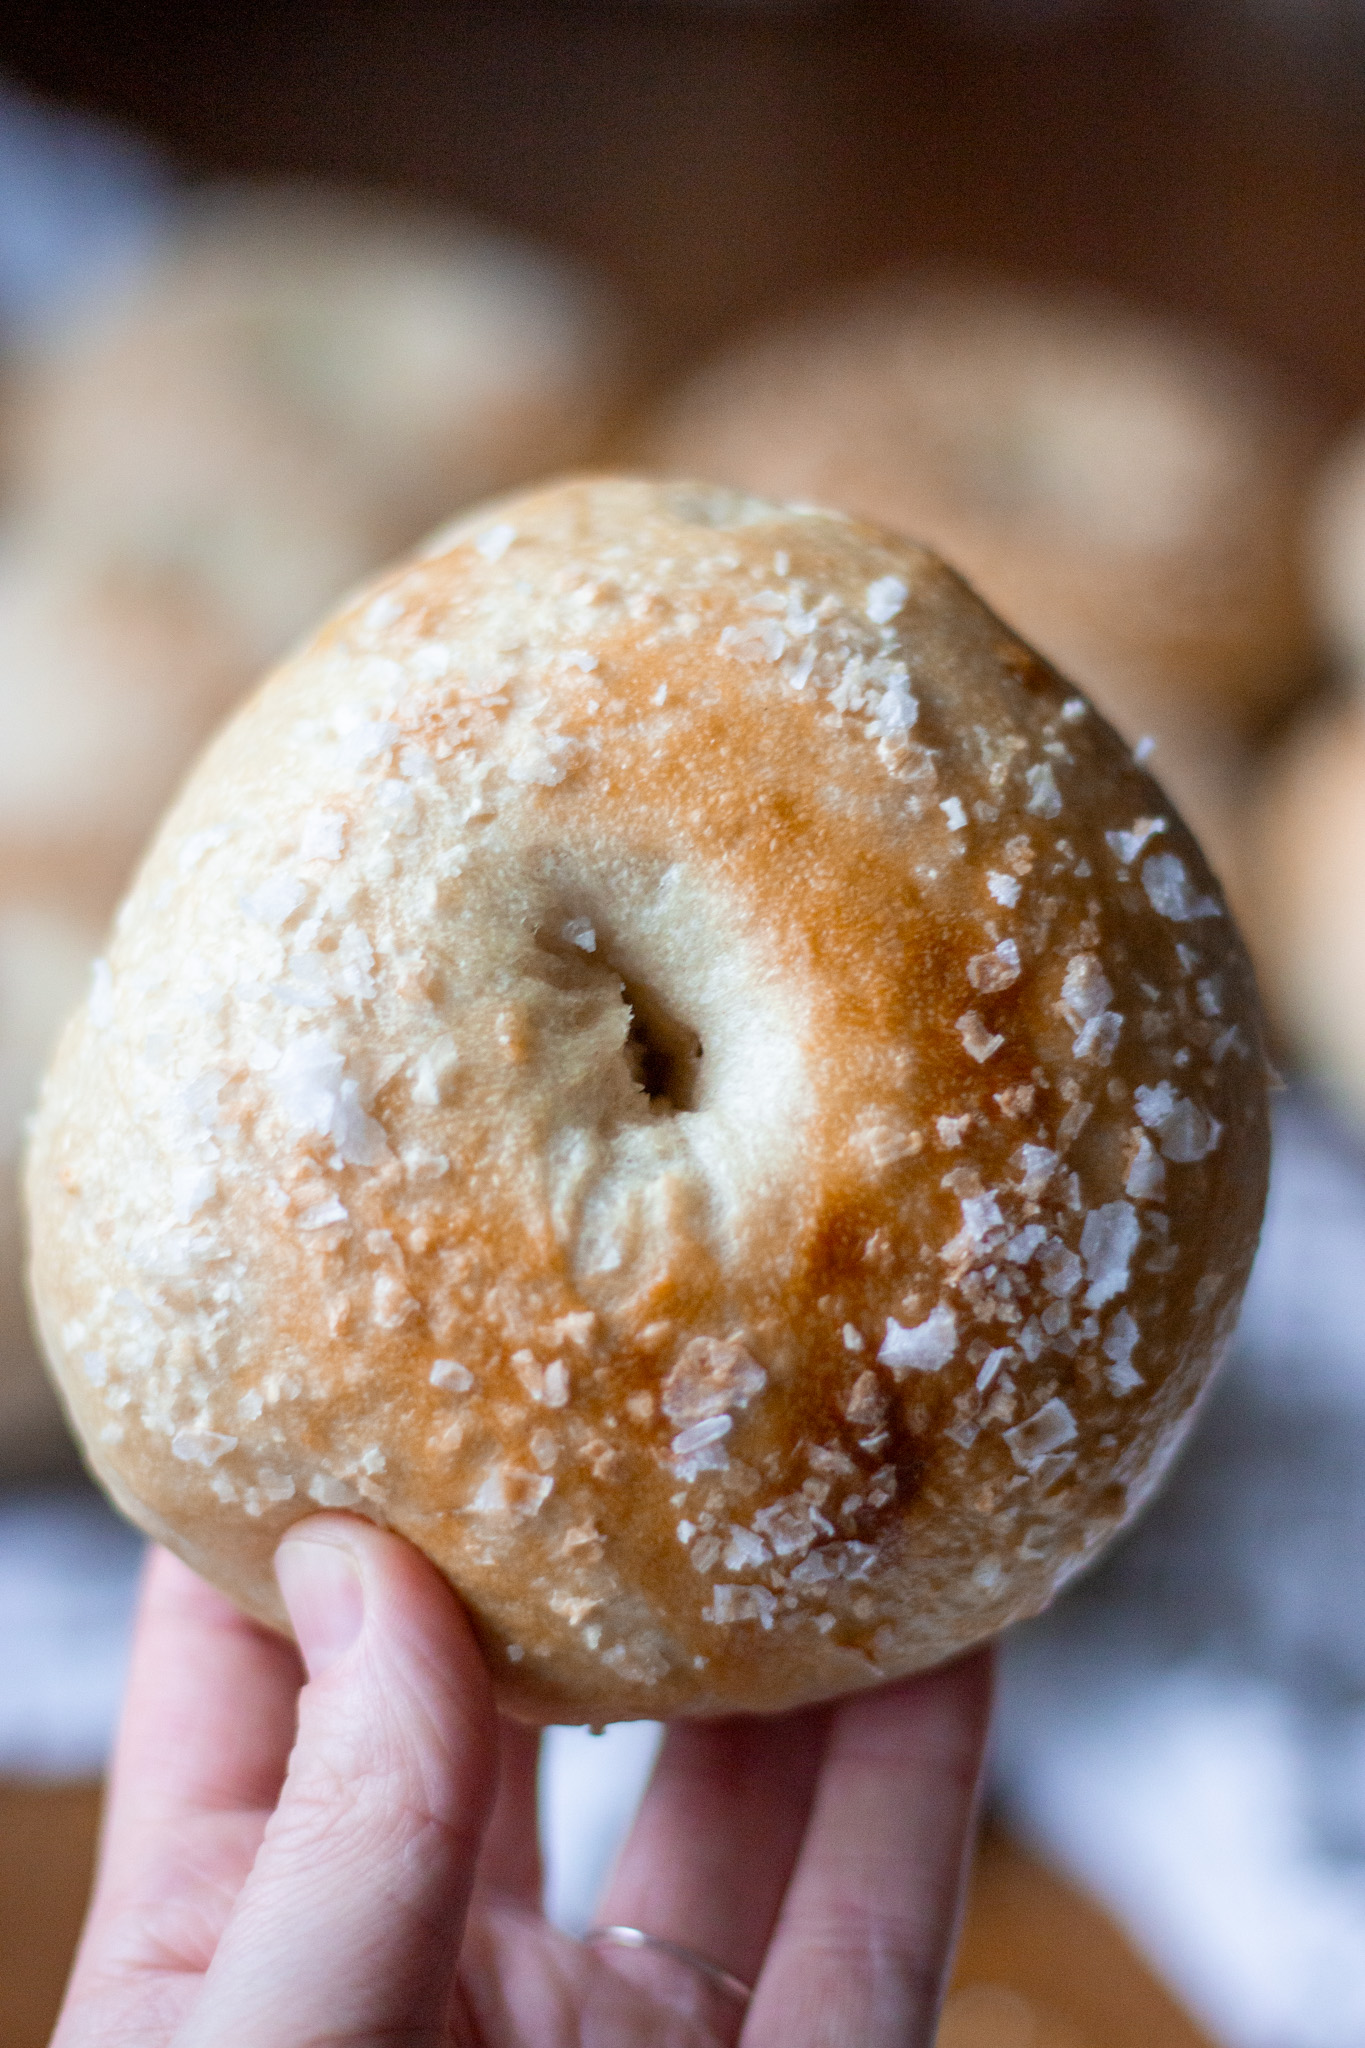
- Salt - I didn't find out about salt bagels until adulthood and they are amazing. Get yourself some Maldon and go to town! (Yes, you do have to use a big, flakey salt for these!)
- Cheddar/jalapeño - Really, you can do any cheese, but this is a classic combo. Pile on freshly grated cheese and top with sliced jalapeño (fresh or pickled both work!)
- Cinnamon/sugar - If you want a sweet bagel, you can't go wrong here. A mix of brown sugar, cinnamon, flour, and melted butter (enough to make it wet sand consistency) will give you the cinnamon-sugar crunch.
Of course, plain bagels are amazing, too!
The egg wash - This is optional, but I do find it helps the toppings to stick. You can just put the toppings on the bagels right after they come out of the waterbath, and they'll stick to the wet bagels, but the egg wash helps them to stick even better.
I use an egg wash for dry bagel toppings (seeds and salt). For "wet" toppings (AKA, anything that will melt, like cheese or sugar), you can go ahead and skip it.
Baking
20-25 minutes will do the trick for these. I highly recommend using a thermometer to check that your bagels are done - they won't sound hollow when baked as some bread does.
Since these bake on two baking sheets, I like to rotate the pans halfway through baking for even browning. Otherwise, the top pan will be very brown and the bottom pan will be very light.
Storage
If you're making bagels, I HIGHLY recommend you enjoy them fresh. They're best in the first hour out of the oven. But, if you have any leftover, you can store them in a plastic bag. They'll stay fresh and soft for up to 3 days at room temperature.
If you use cheese toppings, or anything else that needs refrigerating - store your bagels in the fridge once they've cooled.
Salt bagels do NOT keep well (their one flaw!). The salt absorbs into the bagel if you keep it in a plastic bag, so I would try to eat those within the first day they're made.
Plain bagels can be frozen for up to 3 months.
Like all fresh, homemade bread, these will start to lose their freshness in 2-3 days. If you find yourself with a tough bagel, toast it to freshen it up.

The Best Sourdough Bagels!
Ingredients
For the Bagels
- 500 grams warm water
- 250 grams active sourdough starter
- 50 grams light brown sugar
- 1000 grams flour (bread flour will give you the chewiest bagels, but all purpose works too!)
- 18 grams salt
For the Toppings
- Egg wash: 1 egg + 1 tablespoon water
- Additional toppings, if you're using them (see the post for toppings ideas)
For the Water Bath
- 1 tablespoon honey or brown sugar
- 1 tablespoon baking soda
Directions
Making the Dough + First Rise
- Combine the water, starter, and sugar in a large bowl. Add the flour and salt and combine until no dry flour remains. Mix with your hands when it becomes too difficult with a fork. Mix this VERY well until the dough is completely cohesive. This is much easier to do in a stand mixer but you can do it by hand if you're up for a workout! Once mixing is done, I like to pick the dough up and squish it around to ensure there are no dry pockets.Cover and let the dough rest for 45 minutes, then perform a round of stretch and folds to form the into a ball. Cover and let rise until doubled in size (anywhere from 8-12 hours).
Shaping Bagels + Second Rise
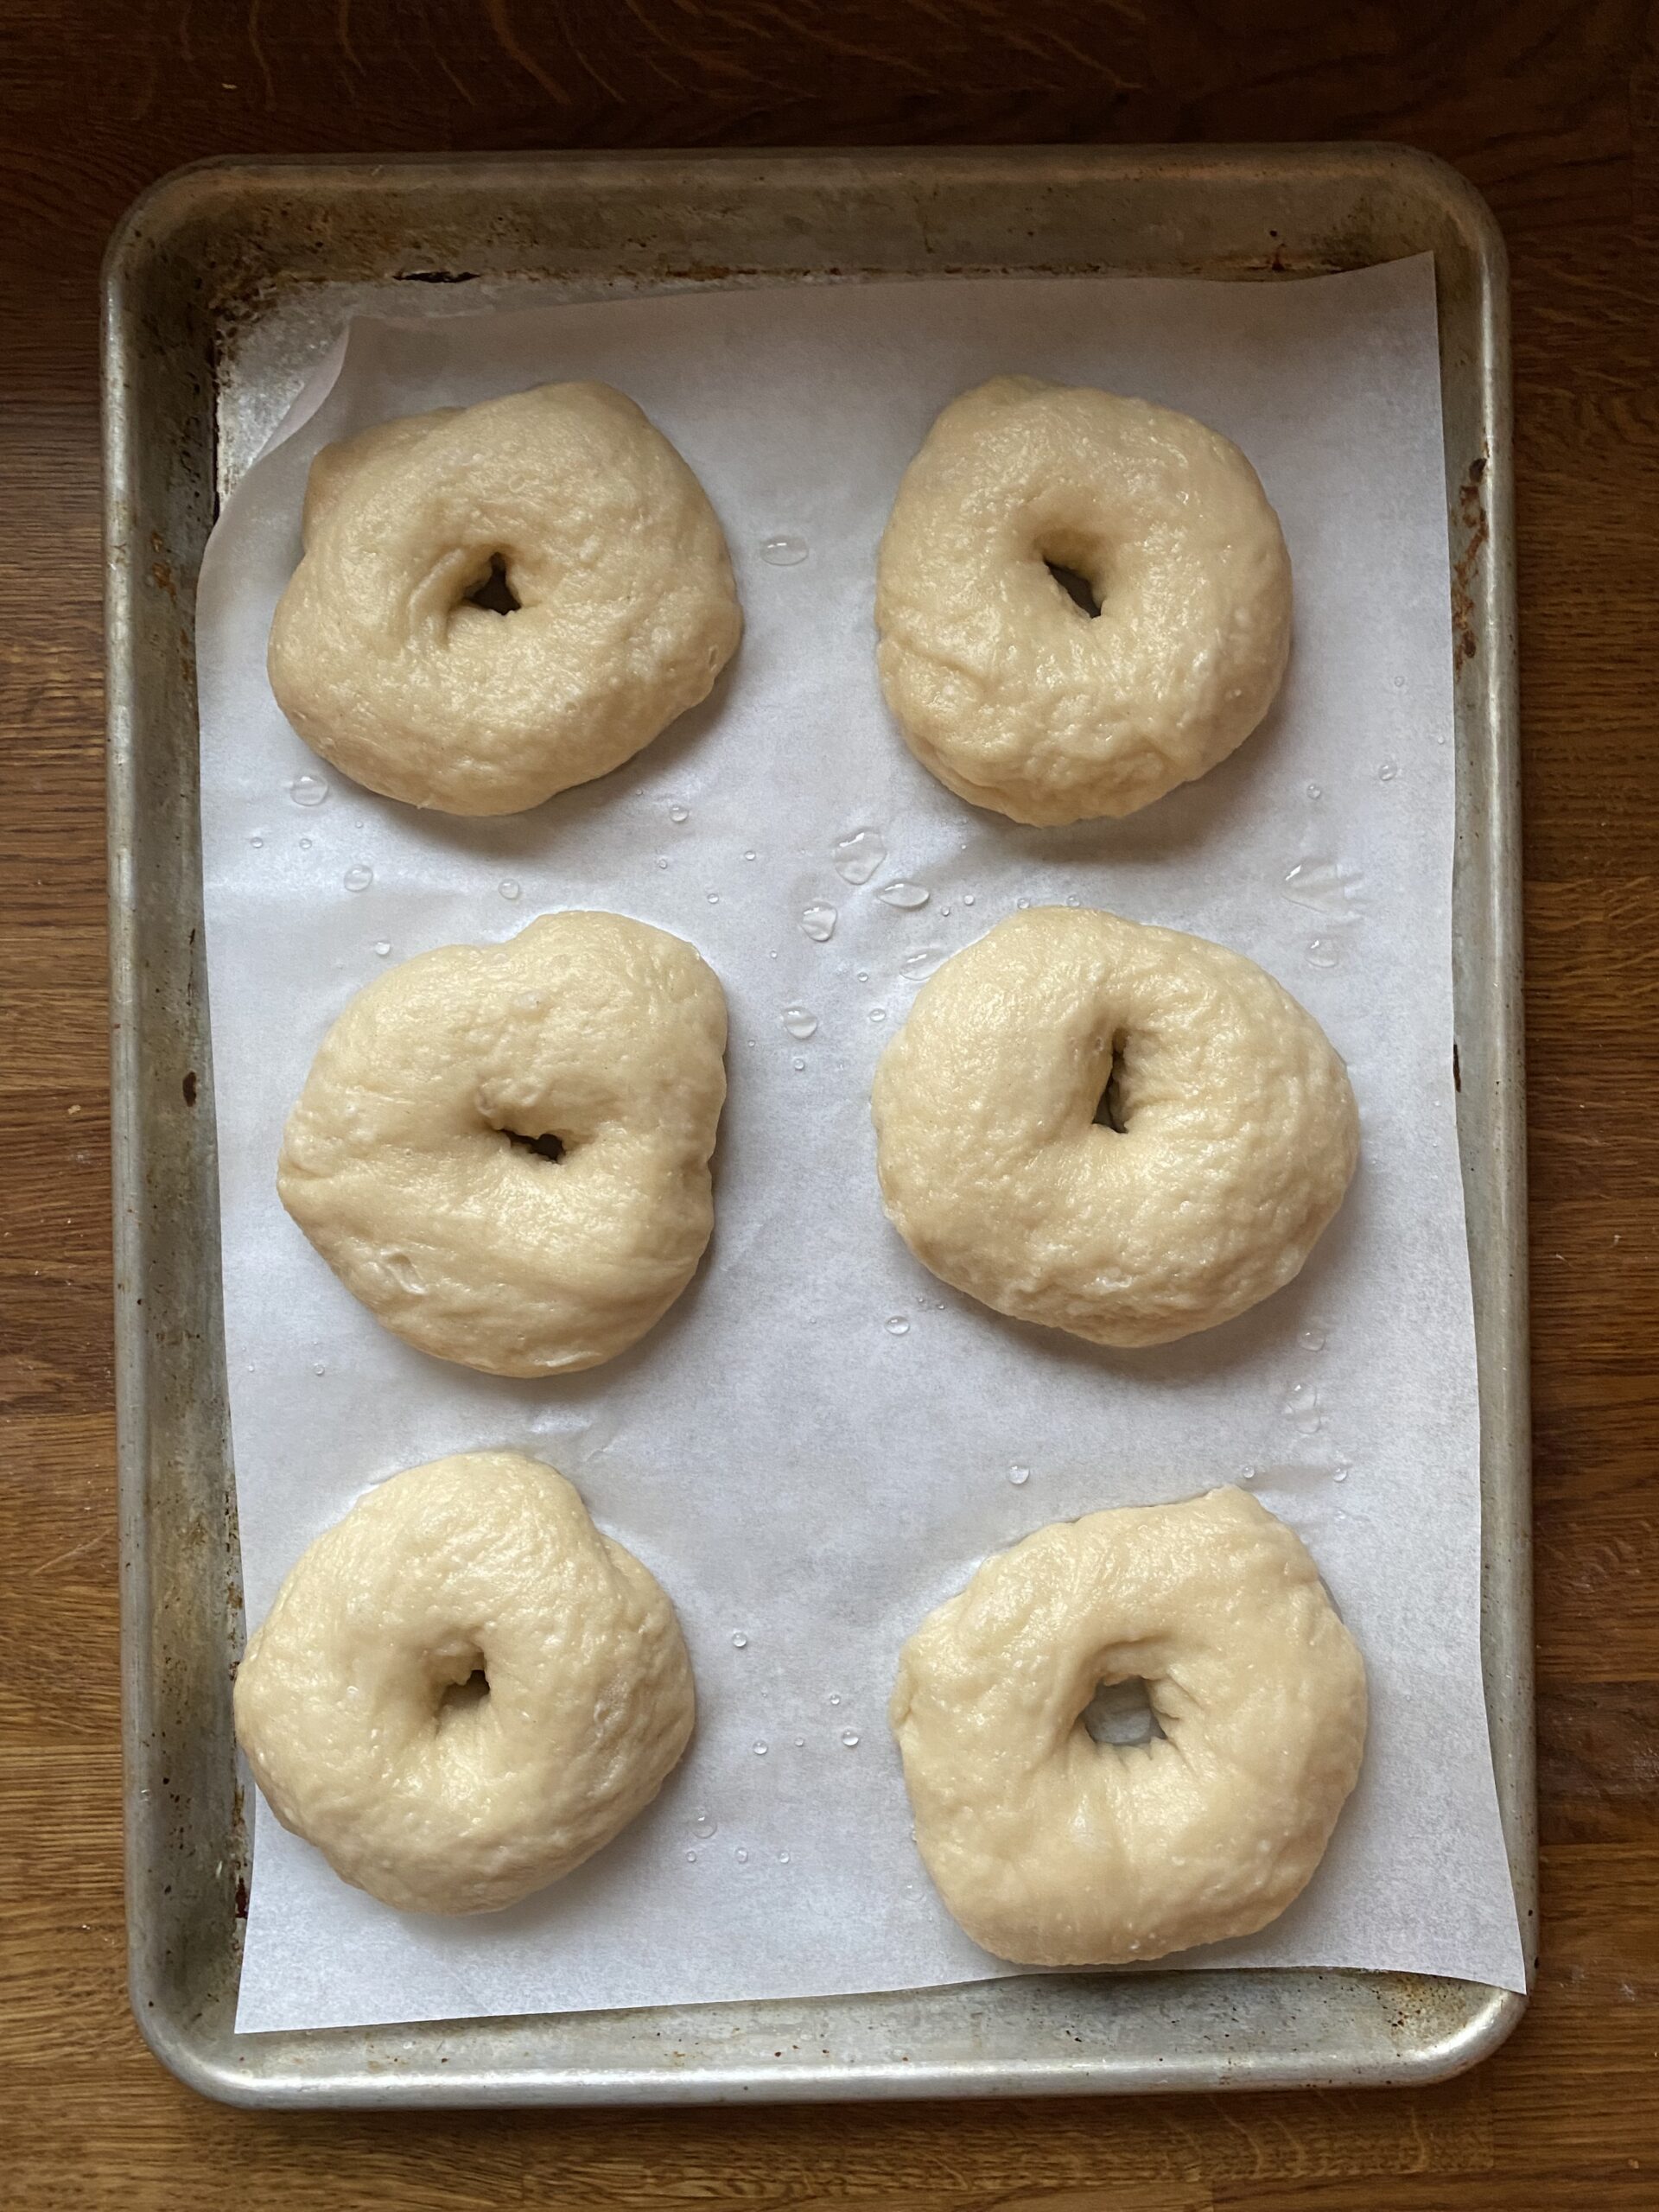
- Cut a sheet of parchment paper into 12 pieces, roughly 3" square each. Get out a large baking sheet.Turn the dough out onto a very lightly floured work surface. Deflate the dough and divide into 12 pieces, roughly 150 grams each. Form each piece into a ball, then cover loosely with plastic wrap and let rest on the countertop 15-30 minutes to relax the gluten.For this next step, you'll be working with one ball of dough at a time and you want to be sure to keep all the other pieces of dough covered - it tends to dry out quickly. With one ball of dough at a time, poke a hole in the center all the way through to the countertop. Lift the dough off the countertop and gently stretch out the hole. Using both hands, roll in the air on your pointer fingers to stretch further. Make this about 2x as big as you want it in your finished bagels - they will shrink a lot during baking! Place on a square of parchment paper on a baking sheet and cover. Repeat with the remaining pieces of dough. Cover very well with plastic wrap and let rise 2-3 hours, until significantly puffed up. (You can also refrigerate at this point and let them do the second rise overnight!)
Boiling + Baking
- Preheat oven to 425 degrees with both racks toward the center. Line two large baking sheets with parchment paper.Make the egg wash by whisking together 1 egg + 1 tablespoon water in a bowl.Bring a large pot of water to a boil. Whisk in the sugar/honey and baking soda. Add 2-3 bagels - parchment paper and all - to the water and boil for 30 seconds, flipping halfway through. The parchment paper will easily peel off the bagels after they've been in the water for a bit. Remove the parchment squares with tongs and discard or set aside to dry and reuse for future bagels. Using a slotted spoon, remove the bagels to a sheet pan lined with parchment paper, rounded side up. You can fit 6 bagels per pan once they're boiled. Continue until all bagels have been boiled. Brush the tops of the bagels with the egg wash if needed (see notes) and sprinkle with any toppings.Bake bagels for 20-25 minutes. I like to swap the baking sheets halfway through baking for even browning. Bagels are done when they're cooked to an internal temperature of 200 degrees and browned to your liking. Transfer bagels to a wire rack to cool. Let them cool for at least 20 minutes before eating, and definitely enjoy one warm!Leftovers can be stored in plastic bags for up to 3 days. Keep at room temperature unless your toppings need to be refrigerated.
Notes
-
- Everything bagel seasoning
- Sesame seeds
-
- Salt (MUST be a flakey salt such as Maldon)
-
- Cheddar/jalapeño
-
- Cinnamon/sugar


Robin C. says
These were super delicious- so soft inside, with the perfect outer chew. It was also the most fun sourdough recipe I've made! The dough was easy to work with and I love that it made 12 bagels so I could experiment with a variety of toppings. These are far better- and larger!- than any bagels I can buy locally.
Mandy says
Well this is the best review ever. Thanks, Robin! 🙂
Brooklyn says
Made these for the first time and they’re delish and fun to make! I did burn the bottoms though and I’m guessing that’s because of the brown sugar in the water. Any suggestions to prevent future bottom burning?
Mandy says
Hmm I haven’t had this problem! I wonder if it could be your oven? The sugar should help with the crust and browning, but definitely shouldn’t burn! Did you bake them toward the top of the oven? Otherwise, I’d say maybe shorten the bake time next time!
Brooklyn says
My rack is in the middle of the oven. Would it be better for me to try these closer to the top of the oven instead?
Mandy Jackson says
Definitely worth a try!