

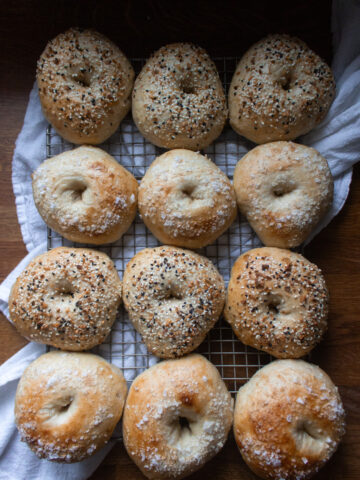
Ultra soft and pillowy dinner rolls, leavened with just sourdough starter. These are enriched with milk, butter, and egg to give them lots of rich flavor and the best soft texture! They're great for holidays, and everyday dinners.

These are super soft!
I don't know if I can say that enough. When I first started making sourdough, I though all sourdough products were destined to have hard, artisanal crusts.
(Which I love, but are not always what I'm looking for.)
Here are amazingly soft rolls, leavened using only an active sourdough starter.

Ingredients
The cast of characters in these rolls includes:
- Butter - Adding fat and flavor, making these super rich.
- Milk - Using milk instead of water makes baked goods softer.
- Sugar - Adds sweetness, moisture, and helps prolong shelf life.
- Starter - The key ingredient for getting these to rise! This recipe calls for 200 grams - a hefty amount, which helps get the job done for this heavy dough. It also means that if your starter is sour, these rolls will probably be quite sour as well.
- Egg - Helps everything hold together and adds richness.
- Flour - I use all purpose here.
- Salt - Always essential. You don't know when it's there, but you sure can tell when it's not!

How to Make
Start by melting the butter in a skillet. Once it's melted, pour in the milk. This is my favorite "trick" for getting butter melted + the perfect temperature to use with little to no wait time. The warm butter and skillet heat up the milk, while the milk cools the butter down. The result - a perfectly warm mixture.
Next, mix the starter, egg, and sugar in a stand mixer fitted with the paddle attachment. Pour in the milk and butter mixture and continue mixing until combined. Add the flour and salt and mix until no dry bits remain.
At this point, all of the ingredients have been added and it just needs to be kneaded. This is how the gluten will develop here, for perfectly chewy rolls.
Switch to the dough hook and knead on LOW speed for 8-10 minutes, until the dough can be stretched thin enough to see light through, without breaking. (AKA, the windowpane test).
Cover the dough and let it rise until doubled in size. This may take longer than your typical sourdough loaf since this dough is so heavy. Mine typically takes somewhere between 12 and 14 hours.
Once the dough has risen, turn it out onto a floured work surface and divide into 15 pieces. You can use a scale here if you really want to be precise!
Grease or butter a 9 by 13-inch baking dish. Shape each piece of dough into a roll (if you don't have a method for this, I recommend the basic one shown in this post) and place in a 3 by 5 grid in the prepared baking dish.
Cover and let rise again until significantly puffed up. This, again, usually takes longer than usual since this dough is so heavy. Around 2 or 3 hours was typical for this past winter, but they could be ready in as little as 1 hour in more favorable climates!


Bake in a 350 degree oven for 25-30 minutes, until they're perfectly golden brown and cooked through.

Once they're out of the oven, there is one final (very important!) step to do for ultra soft and flavorful rolls. Brush the tops with melted butter, and sprinkle with kosher salt.
Making Ahead
I've gotten lots of comments on this post from people wondering if these rolls can be made ahead, and I've been testing methods to be able to give you a good answer!
I tried freezing these after shaping and had okay results letting them thaw and do their second rise before baking. In my cold November kitchen, this took about 8 hours. They weren't quite as soft as they normally are, but I'd say in a pinch, this would totally work!
Baking them straight from the freezer did NOT work well. There was minimal rise, minimal browning, and they really just looked sad.
If you want to make these ahead, the best way to do it is to let them do the second rise in the fridge. Right after shaping, cover the rolls well and refrigerate for up to 48 hours. You can bake them straight from the fridge if they look like they've puffed up a good amount, or let them finish rising at room temperature then bake.


Soft Sourdough Dinner Rolls
Ingredients
- 5 tablespoons unsalted butter
- 240 grams whole milk
- 200 grams active sourdough starter
- 1 egg
- 50 grams sugar
- 500 grams all purpose flour
- 13 grams salt
- For finishing: 2 tablespoons unsalted butter (melted), kosher salt
Directions
- Melt the butter in a large skillet over medium-low heat. Once melted, remove from heat and pour in the milk.To the bowl of a stand mixer fitted with the paddle attachment, add the starter, egg, and sugar and mix until combined. Add the butter mixture and mix until combined. Add the flour and salt and mix until no dry flour remains, scraping down the sides of the bowl as needed. Switch to the dough hook and mix on LOW speed for 8-10 minutes, until the dough begins to look smooth and passes the windowpane test (you can pull a piece of dough apart enough to let light pass through it without the dough tearing). Cover and let rise until doubled in size - 12 to 14 hours. Grease a 9 by 13-inch baking dish. Turn dough out onto a lightly floured surface. Divide into 15 pieces and shape into rolls. Arrange in a 3 by 5 grid in the baking dish. Cover and allow to rise at room temperature until significantly puffed up, about 1 ½ - 3 hours.Preheat oven to 350 degrees. Bake rolls on middle rack for 25 - 30 minutes, until browned to your liking and baked through. Remove from oven, brush with the melted butter, and sprinkle with salt.Fully cooled leftovers will keep in an airtight container or ziplock bag at room temperature for up to 3 days. Reheat in the microwave wrapped in a slightly damp paper towel for optimal softness.


Laura says
Hi Mandy ~ wondering if this would work as a loaf rather than individual rolls - have you tried that?
mandyjackson says
I haven’t tried this, but I think it would work well in a loaf pan! If you do try, I’d probably split the dough in half and make two loaves since there’s so much dough here.
Teresa Prestridge says
Hi Mandy - This dough is wonderful to work with!! My question is, can I freeze the dough after I shape the rolls?
mandyjackson says
Hi Teresa - Sorry for the slowest response ever, but I wanted to test this before getting back to you! You can freeze the dough after shaping, then arrange them in your greased baking pan, cover, and let them thaw and do the second rise at room temperature. This will likely take about 8 hours depending on the temperature of your kitchen. Hope this helps!
Jennifer says
Can we cold proof in the fridge too after bulk ferment?
mandyjackson says
Yes! You can do the second rise in the fridge after shaping.
Stephanie Brown says
How long would I need to hand mix and hand kneed this dough,no mixer available.
mandyjackson says
Aim for the amount of time listed in the recipe. The reason I prefer a mixer for this dough is because it’s quite wet, so you will likely need to add extra flour while kneading by hand. It should work great!
Stephanie says
I used gluten free flour and the dough is still really runny…. Recommendations?
mandyjackson says
Sorry to be no help here but I’ve never used gluten free flour!
Lori says
I have thrown this recipe in my bread maker so many times just for the kneading process and then taken it out and shaped it and then let it have a 30 minutes rise and baked them. My family just loves them. Sometimes I will throw it in the fridge and shape and bake them the next day. What a great recipe!
Anne Thom says
Hi! I saw your reply on another comment about being able to do the second rise in the fridge. How long do you think the shaped rolls would be able to last in the fridge before baking? Minimum vs maximum time in the fridge? Thank you!!!
mandyjackson says
Hi Anne! I’d do anywhere from 12-48 hours for a second rise in the fridge. If they don’t look like they’ve puffed up enough, you can always let them proof at room temp for a bit before baking.
Tabitha says
What is your schedule when you make these? Do you start them late the night before you want to bake?or extra early?
mandyjackson says
Hi Tabitha - I usually start these the night before, let them do their first rise overnight, then shape around lunchtime and let them do the second rise through the early afternoon. If they seem to be rising too quickly, I pop them in the fridge to slow it down.
I’ve also started them the morning of, but usually need to put the dough in the oven or microwave with the light on to speed things up. Hope this helps!
Jordan Heartwell says
So when mixing together to let it rise its safe to leave on the counter for 12-14 hours (rising time) with the egg?
mandyjackson says
Hi Jordan! Great question. I have two thoughts on this:
1. You have to remember sourdough isn't your typical raw food being left at room temperature - it's fermenting, meaning good bacteria is multiplying and prohibiting the growth of bad bacteria.
2. Salmonella is killed off at 165 degrees Fahrenheit, and bread will cook to at least 200 degrees.
That being said, I am not a food scientist! My anecdotal experience is that I've made this recipe lots of times (and others involving egg/yogurt/milk that's left to proof at room temperature) with no issues. Don't eat the raw dough, and wash your hands/work surface after working with it. Hope this helps!
Emily says
Hi! Can you use bread flour to make these rolls or would those change the texture?
mandyjackson says
Hi Emily! Yes, feel free to use bread flour here if you want. It will change the texture, but only marginally.
Theresa says
When weighing the flour I have noticed it asks for 500 grams of flour. When I made the conversion to cups it says that equals 2 cups but when I weighed 2 cups flours it only weighs 300 grams. Is there a typo with the four?
mandyjackson says
Hi Theresa - 500 grams of flour is the correct measurement, and I highly recommend using weight measurements here. The typical conversion to cups for all purpose flour is 120 grams per cup, so if you really need to do cups, it would be 4 cups + 2.5 tablespoons.
Molly says
Do you cover these when baking?
mandyjackson says
No, leave them uncovered!
Kaylie says
I’m preparing these today for Thanksgiving (2 days away) I plan on leaving in the fridge after shaping close to 48 hours. I would love to triple the recipe but I know sometimes measurements get lost in translation. Should I make 3 separate recipes? Or would it be safe to make one huge one? Maybe 1 and a half and 1 and a half? Trying to minimize on dishes with all of the other Thanksgiving prepping.
mandyjackson says
Hi Kaylie! It just depends on how much your mixer can handle. I have a 5 quart mixer and have doubled this with no issues, but wouldn’t do more than that at once in it. Hope these are a hit! Sounds like you’re in for a fun Thanksgiving just based on the quantity of rolls 🙂
Kaylie says
Absolutely! Thank you so much!
Kaylie says
I gave 5 stars, don’t know why that was 4 🤦♀️
Jamie says
Hi! I started these this afternoon it’s currently 1:30 pm my time and I just covered to proof for 14 hrs. Problem is that will be 3:30am my time, would i be able to pop the dough in the fridge at that time so it doesn’t over proof and then shape in the morning?
mandyjackson says
Hi Jamie - I’d pop it in the fridge before going to bed, then either shape them in the morning and give them some extra time for the second rise, or let them rise for a few hours, shape, then do a normal second rise.
Jamie says
Awesome, do you think after shaping them in the morning I’d be ok to do the second rise in the fridge? Was planning to do that so I can bake them on thanksgiving day!
mandyjackson says
Yes! I think that will be fine. Just make sure they're nice and puffed up before baking. You may need to let them sit at room temperature for a bit.
Riley says
After making these, I realized that I forgot to let them sit on the counter and rise before making the balls and putting them in the fridge. Will they still work?
mandyjackson says
I’d let them do an extra long rise once they’re out of the fridge, until they look very puffed up. I’m not sure how well they’ll hold their shape, but you’ll still have soft, homemade rolls 🙂
Olivia says
When feeding your starter to prep for making these rolls how much do you feed your starter?
mandyjackson says
I usually feed it 100 grams each of flour and water, but I keep a decent size starter (around 100 grams). If you keep less, you may want to feed it a couple times to bulk it up to get to the 200 grams you need for this, otherwise if you give it a really big feeding and wait for it to rise, it could get too sour.
For example, if you keep 25 grams, I’d feed it 50 grams water + 50 grams flour. Then at the next feeding add 100 grams of water + 100 grams of flour. You’ll have 200 grams to use plus 125 left over.
Taylor Jenkins says
How long after feeding your starter do you use it? When it’s at its peak or do you just use its discard?
mandyjackson says
For this recipe I use active starter, and try to use it at its peak. Mine usually takes about 4 hours to reach its peak after feeding, but it will depend on how much you feed it, how warm your kitchen is, etc.
Jenn says
Just wondering why my dough is so sticky? I followed the recipe to a T and after mixing with the dough hook, it’s sticking to the sides and on itself
mandyjackson says
Hi Jenn - This is a very sticky dough! That’s part of what makes these rolls so soft. It will be easier to handle after it rises.
Michelle Martorell says
Hi!!! When you say leave it to rise for close to 14 hours is that at room
Temperature or at the fridge? Asking as it’s my first time using something with milk. Happy Thanksgiving!
mandyjackson says
Hi Michelle! That’s at room temperature. Happy Thanksgiving 🙂
Laci says
Making these for thanksgiving tomorrow. I’m kinda a newbie. Do I want the internal temp when done the same as a boule. 195-205?
mandyjackson says
Hi Laci - yes! Between 200-205 is what I aim for. Happy Thanksgiving!
Laci says
These turned out perfectly and were a huge hit! Thank you
Jessica says
This recipe was so fun and easy to make!! I ended up kneading with my hands lightly with the dough still in the bowl for 8 min (I didn’t add any additional flour) and they turned out amazing!!! I will definitely be making these again! Thank you for the recipe!
mandyjackson says
Yay! That’s helpful to know about the hand kneading - thanks for this comment! 🙂
Grace W says
made these for thanksgiving 2024 and they didn't disappoint. I just started doing sourdough too, and I was doubtful these would rise and be fluffy like traditional dry yeast rolls. If you follow the steps, you'll get a RICH and YEASTY smelling bun. So yummy. My husband said they're like the rolls you get in grade school lunch cafeterias on "Thanksgiving lunch" days. Thanks so much for easing me into sourdough with a successful recipe!!
mandyjackson says
Haha! This is amazing. Glad these were a hit!
Kari says
You melted butter and then added the milk. Could I just use butter milk instead.
mandyjackson says
Hi Kari - Buttermilk would not be a substitute for this.
Mandie says
Help! I may have messed up the order of mixing in… like adding the flour before the butter mixture. Are they ruined?
mandyjackson says
I think it would take longer to incorporate the liquid, but I can’t imagine this would ruin them… only one way to find out!
Jenica says
These rolls are so good, we had them for Thanksgiving and made them again for Christmas.
Question though is for reheating- if I bake them ahead of time, what would be your advice for reheating the entire tray in the oven?
mandyjackson says
I’d aim to slightly underbake them the first time around so they’re cooked through but not browned. Then reheat for 7-10 minutes at 350 degrees. Do the butter and salt at the end of reheating.
Glad these were a hit!! 🙂
Markelle says
Hi, what time do you start making these to have the ready at dinner time? I’m trying to count backwards, and it seems like I’ll need to start the process in the middle of the night, the night before??
mandyjackson says
Hi Markelle - you have a couple options that do not require mixing dough in the middle of the night! 🙂
In the winter, I’ll start these the night before around 9, let them rise overnight, shape mid-morning or early afternoon, then bake just before dinner. We keep our house quite cold so I’m able to push rise times pretty far.
In the summer, I can start these the morning of around 7 and have them ready for dinner. If you need to slow things down, you can pop the dough in the fridge. To speed things up, put the dough in the oven or microwave with the light on. This is a very forgiving recipe!
Abby Henretty says
Hi! Can I parbake these? If so, how would I do it? I want to make them ahead for Easter dinner but I want them fresh!
mandyjackson says
Hi Abby! I’ve not parbaked these rolls before so I’m not sure how well it would work. You can do the second rise in the fridge for up to 48 hours and bake them when you’re ready to have warm rolls - details on this are at the end of the post. Hope that helps!
Elise says
Hi! Can I freeze to preserve after baked and recook to warm them back up similar to an artisan loaf?
mandyjackson says
Yes! Make sure to cover them while reheating so they don’t dry out!
Joy Sladick says
Hi! Can I use honey instead of sugar?
mandyjackson says
Hi Joy! I haven’t tried using honey in these, so I can’t say for sure. My best guess is it would work great! I’d love to hear how it goes if you try it 🙂
Jackie says
I have my rolls in the oven right now! I normally put rolls on wire rack after cooking. Should I with this recipe? This is only my second time using sourdough.
Mandy says
No need for a wire rack with this recipe! Hope you love them 🙂
Shirley says
I was looking for soft dinner rolls to take to an extended family Thanksgiving. These were a new recipe, and they were a dream come true! Even my very picky brother in law asked if he could keep the leftovers, that’s when I knew this recipe will be treasured and shared for a long time!! Absolutely perfect!
Mandy says
Love this! So glad these were a hit 🙂
Rose Johnson says
When you say room temp what is that about? Everyone keeps their houses at different temps. I’m just trying to figure out timing since I keep my house quite warm… like 75-76 degrees
Mandy says
Hi Rose! Yes, I’m always hesitant to list a time in the recipe because it depends on so many variables. If your house is that warm, I’d guess it would take closer to 8 hours. That is just my best guess though. As always, go by visual cues rather than watching the clock 🙂
Sophia says
I follow this recipe EXACTLY, with one exception: I replace the sugar with maple syrup. They come out pillow soft!! I typically make the dough, rise, shape then refrigerate over night, let sit 1-2 hours at room temp and bake. This is the only thing my kids ask me to bring on holidays. They LOVE these rolls!
Mandy says
Aww love that! <3 Maple syrup is a great idea!