

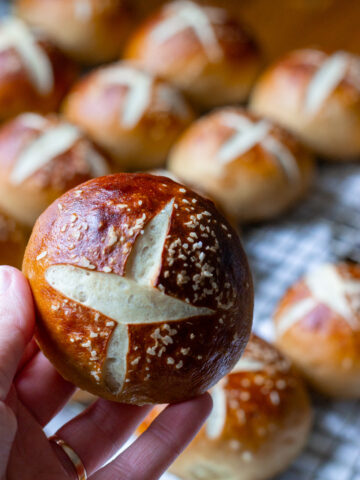
Homemade sourdough hamburger buns! They're soft and pillowy, but firm enough to withstand a heavily loaded burger. You may never go back once you try these.

If you'd asked me a year ago if I would every make my own burger buns, I would have laughed.
Like the whole point of burgers is they're supposed to be laid back and easy and making your own buns - with enough foresight to use SOURDOUGH - seems like the anti-burger vibe to me.
But I tried it. And wow. I may never go back.
Hamburgers are just indescribably better with a really excellent bun. I don't want to say the buns stole the show here, but WOW. They took the whole experience to another level.

I love these buns because they're both soft and pillowy (like so soft, when I went to pick one up after baking, my finger poked through it - so much softer than I was expecting!), but still firm enough to withstand a burger that's loaded high with toppings and condiments.
Oh, and do you love your burger with a toasted bun? These toast so well.
Since this dough uses A LOT of sourdough starter, the rise is actually quite quick by sourdough standards. If you start these the morning of, you can be eating them for dinner!

The dough
This dough is supple and easy to work with, but also quite wet. What a weird combo! You can make it without a mixer. It's fun to do by hand!
Ingredients
- Butter - The recipe calls for softened butter, but you can use cold if that's what you've got! Just chop it up before mixing into the liquids - you will have to spend more time working it into the dough. If you want to substitute this out, I'd recommend another fat that's solid at room temp - like coconut oil.
- Water AND milk - The combination makes these extra soft!
- Sourdough starter - The only leavening we need here. Again, there is a LOT of starter in these, so you may need to plan ahead and give your starter a hefty feeding if you're planning on making these.
- All purpose flour - I've only ever made these with all purpose flour and have loved the results!
- Sugar - There is a smidge of sugar in these, for a tiny tiny bit of sweetness, but mostly for the texture + shelf life benefits.
- Salt - Regular table salt. It's a must!
Mixing
To make the dough, you'll mix the butter, milk, water, and starter together. The butter will be in hunks - this is fine!
Then, mix in the dry ingredients. Stir with a fork or spoon until it gets too challenging to mix, then switch to using your hand. You'll want to spend a good 3-5 minutes working the dough together here. Pinch any bits of butter you see to disperse it throughout the dough. You want a completely even consistency.
Then, cover and let it rest.


Stretch + folds
I like to do 3 rounds of stretch and folds within the first 3 hours for this dough - no more and no less. It's important for building the structure of your buns, and controlling the rise.
Don't skip these - you will be amazed at how much the dough changes during these 3 hours!


Shaping
After the stretch and folds, give the dough another 1-2 hours to rise. Then, you're ready to shape!
The dough should look puffed up, there will be lots of bubbles throughout (visible only if you use a clear bowl), and a bubble or two on the surface of the dough.
Turn it out onto a lightly floured surface and divide into 8 pieces. Shape each into a round, and place on a baking sheet lined with parchment paper. Push the tops down gently to form more of a disc - this will give you a bun instead of a roll.
Sprinkle with flour, cover, and let rise 1-2 hours more.


Baking
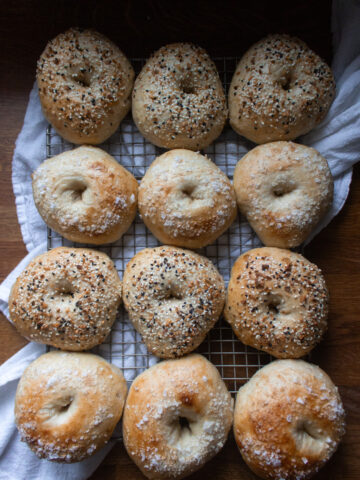
Brush the rolls with an egg wash for a shiny surface and increased browning, and sprinkle with seeds if using (I like to use sesame seeds for a little extra flavor + texture).

Bake at 375 degrees for 20 - 25 minutes. Let them cool completely on a wire rack.

These are best the same day they're baked, but will keep up to 5 days (with a noticeable decline in freshness) in a ziplock bag. Older buns can be toasted or sprinkled with water and reheated in the oven to refresh some of the softness!
Alternate schedule
If you want to slow things down, pop the covered buns in the fridge after shaping. You can refrigerate them up to 24 hours before baking. Just pull out and let sit at room temperature for 1-2 hours before baking, and you may need to add a minute or two to the bake time.

Sourdough Hamburger Buns
Ingredients
- 4 tablespoons (57 grams) unsalted butter, softened
- 125 grams water
- 45 grams milk
- 200 grams active sourdough starter
- 330 grams all purpose flour
- 12 grams sugar
- 9 grams salt
For Topping
- Egg wash: 1 egg yolk beaten with 1 tablespoon water
- Seeds (optional)
Directions
- In a large bowl, combine the butter, water, and milk. There will still be some large hunks of butter - this is okay! Mix in the starter. Add the flour, sugar, and salt and mix with a fork. Switch to mixing with your hand when it becomes too difficult to mix with a fork. At this point, you'll want to spend about 3-5 minutes mixing by hand, ensuring no dry bits of flour remain, and pinching any remaining hunks of butter to disperse. This is a fairly wet dough, but is not overly sticky. Once it's well combined, cover and let rest.Over the next 2-3 hours, you'll want to do 3 rounds of stretch and folds, then let rise for 1-2 hours more, for a total rise time of about 5 hours, until puffed up and bubbles are beginning to form on the surface.Turn dough out onto a lightly floured surface and divide into 8 pieces. Shape into rounds, and place on a baking sheet lined with parchment paper. Press the tops down to form discs, then dust with flour and cover with plastic wrap. Let rise for 2-3 hours more, until puffed up.Preheat oven to 375 degrees. Brush the tops of the buns with the egg wash and sprinkle with seeds (if using). Bake 20-25 minutes, until baked through and golden brown on the tops. Cool completely on a wire rack. These are best on the day they're baked, but will keep for up to 5 days in a ziplock bag.
Nutrition


Michele Smith says
I want to thank you for posting the recipe. My first try didn’t work…I kind of let it rise too long the first time. Still tasted good. 2nd and 3rd try I followed exactly / precisely. I have a scale.(just no egg wash because someone has an egg allergy). PERFECT. I even ordered some new silicone bun molds to make more and share. Soft and tasty. Made hamburger and hot dog buns last night for us and some friends . thanks again
mandyjackson says
So glad you liked these! Thanks for your comment 🙂
Ryn says
Can these be frozen at any point to make later?
mandyjackson says
I’ve not frozen these to bake later, but if I were to try, I’d freeze right after shaping the rolls. Then let them come to room temperature and do the second rise. Would love to hear how it goes if you try!
Jessica says
Another absolute banger!! I've decided I will only make your sourdough recipes forever now. These are so soft and perfect and delicious.
mandyjackson says
Wow, what a compliment!! So glad these were a hit!
Kathy says
Made these this morning. They turned out “melt in your mouth” delicious.
Your recipes rock!
Mandy Jackson says
Thanks, Kathy!