

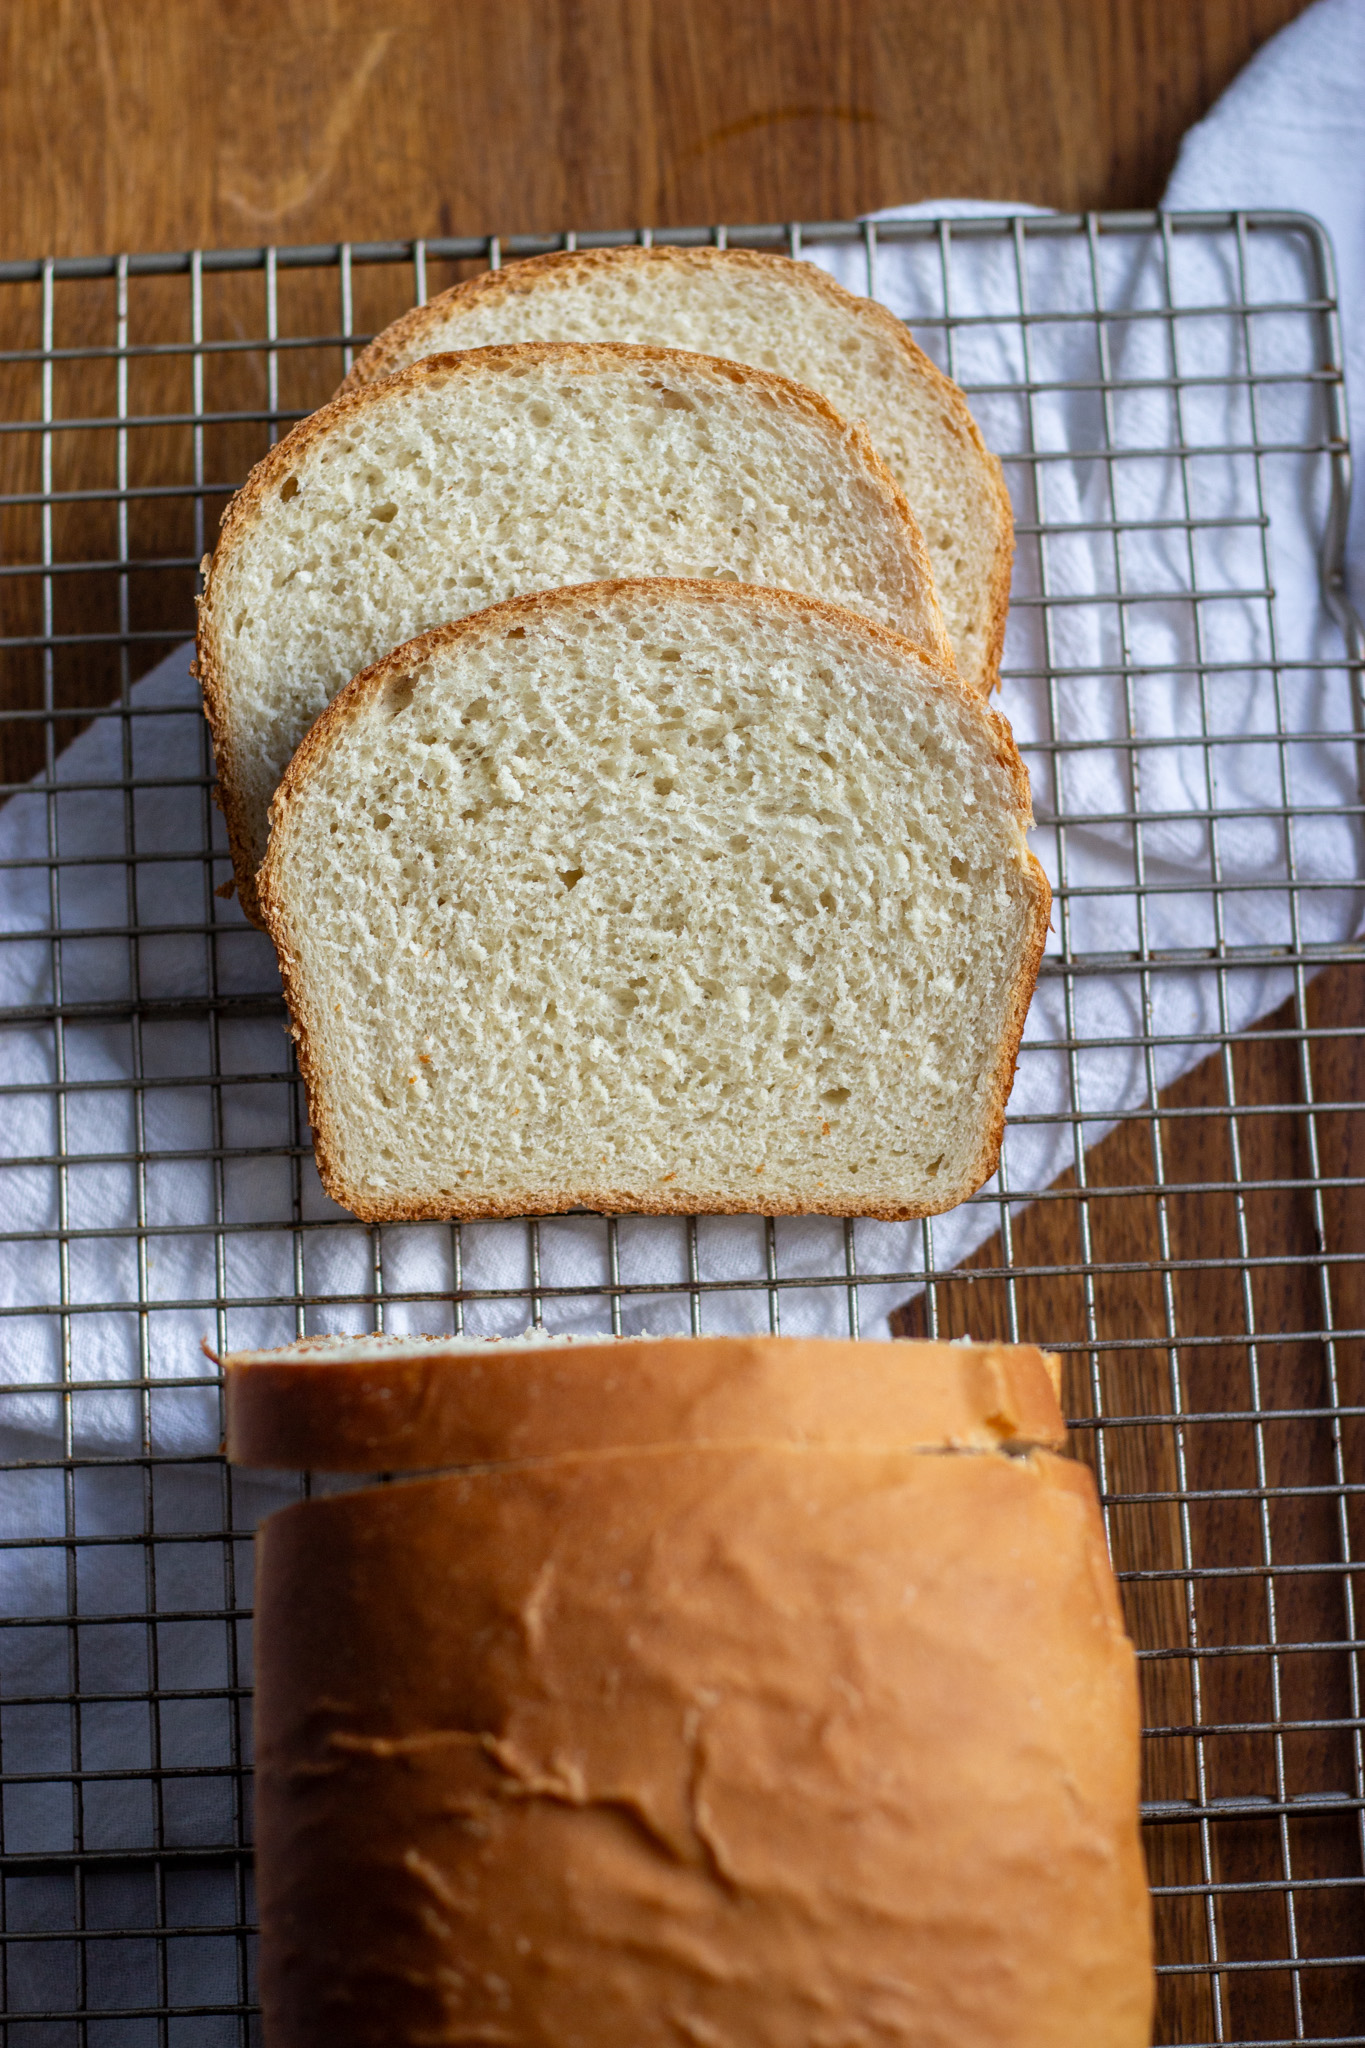
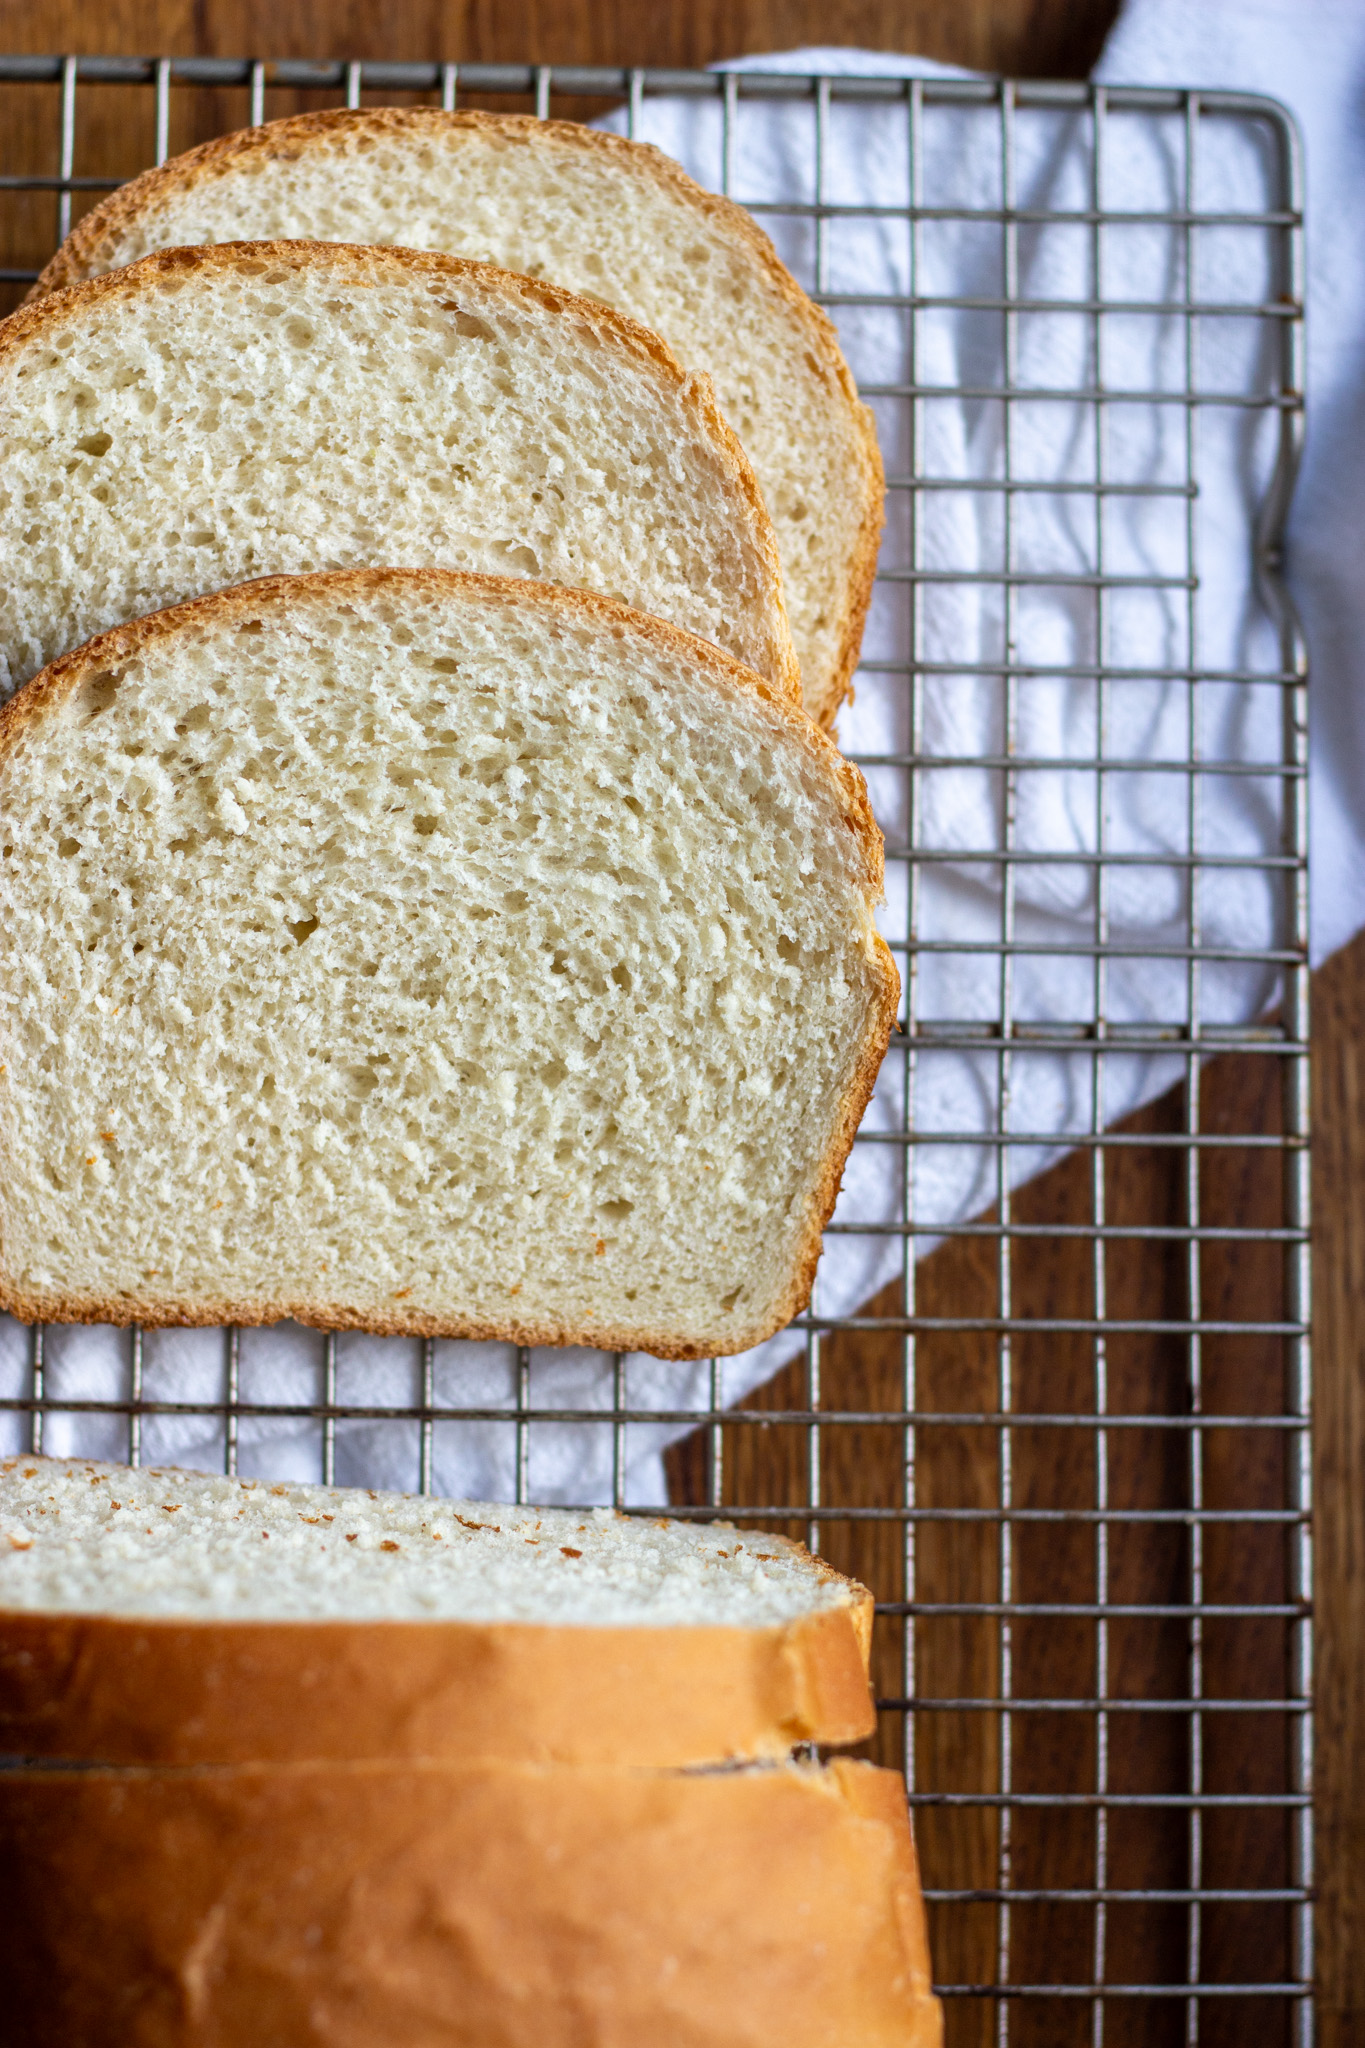
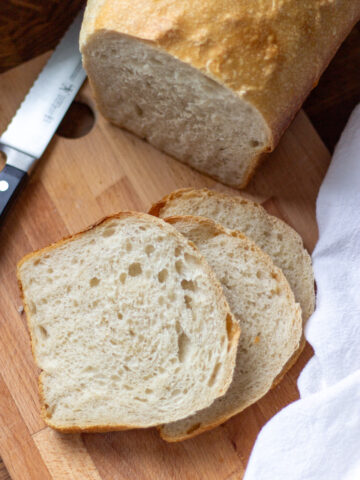
If you're looking to recreate store-bought white sandwich bread while still using your sourdough starter, this is the bread for you! This is one of my go-to recipes when I have a ton of discard to use - each loaf contains an entire cup of sourdough discard, and the addition of commercial yeast means you can have a loaf ready quickly.
It's easy to make, has a thin, soft crust, and is structured enough to stand up to heavy sandwich fillings, while still being fluffy and squishy - everything we want in a sandwich bread!
I NEED to tell you that my 7-year-old told me "mom, this is really good bread!" when he tried this. And if that isn't the best endorsement you've ever heard, it's only because you don't know how RARE his level of compliment is from him.
I love this slow-rise sourdough sandwich bread (and so do lots of you!), but when you need sandwich bread ASAP, or you've got lots of discard hanging out in your kitchen, this is the bread for you!
And really, it's so good you might just start feeding your starter copious amounts so you'll have discard to make this with.

The Dough
This dough should be easy to handle - very malleable but not sticky. It is a dream to work with, and no stand mixer is required!
Ingredients
There is no special trick to this bread - it is a basic and VERY simple sandwich bread, which is one of the things I love most about it!
Here are all the ingredients:
- Water - you want it to be bathwater temperature to help the rise along. Be careful not to make it too hot!
- Sourdough discard - an entire cup of it! This makes up a substantial portion of this bread and adds so much good sourdough flavor to it.
- Sugar - sugar helps to activate the yeast, make the bread softer, improve shelf life, and balance out the tang from the discard.
- Oil - I use olive oil, but any neutral cooking oil will work! This helps give that soft sandwich bread texture.
- Active dry yeast - since this bread uses sourdough discard, it relies on store bought yeast for the rise. You can use an envelope, or use 2 ¼ teaspoons if you buy in bulk! *If you're not sure that your yeast is active, you'll want to bloom it as the first step in this recipe - I have instructions for this in the recipe card.*
- All purpose flour - just 2 ½ cups will do the trick. If you want to use bread flour, that will work great, too.
- Salt - don't forget it!
Answering all discard questions!
Amount - yes, I'm using volume measurements here which I know is annoying to some people! When I weigh my discard, a cup comes out to anywhere between 200-235 grams. If you prefer to weigh your discard, I'd aim for 220 grams. If you find your dough is a bit on the sticky side, you'll dust with additional flour as needed while kneading. No sweat!
Flavor - You can use discard that's quite sour here and shockingly, your bread won't be terribly sour. It does have a really pleasant yeasty taste, but nothing overly sour. Since the discard is being "fed" in a sense and left to ferment (albeit more quickly than in a regular sourdough recipe), it gets refreshed and that takes some of the sour edge off.
So good!
As always, if your discard doesn't smell like something you'd want to eat, don't use it in a
recipe!
Consistency - Discard will be quite liquidy, and I actually consider it a liquid in this recipe. However, if your discard has a layer of hooch at the top, you'll want to pour it off before measuring your discard.
Temperature - This recipe was written with room temperature discard in mind. You can absolutely use discard straight from your fridge, just be aware that the initial rise time will likely be double what's listed in the recipe. Alternatively, you can let your discard warm to room temperature before you make this.
Kneading
For the best texture, you'll want to knead this bread until it passes the windowpane test.
The windowpane test is a way to assess the gluten strength in dough. To do it, pinch a piece of dough and gently stretch it away from the mass of dough. If you're able to stretch it thin enough that you can see light through it before it tears, it passes! If it tears before you can see light through it, it fails and you should keep kneading.
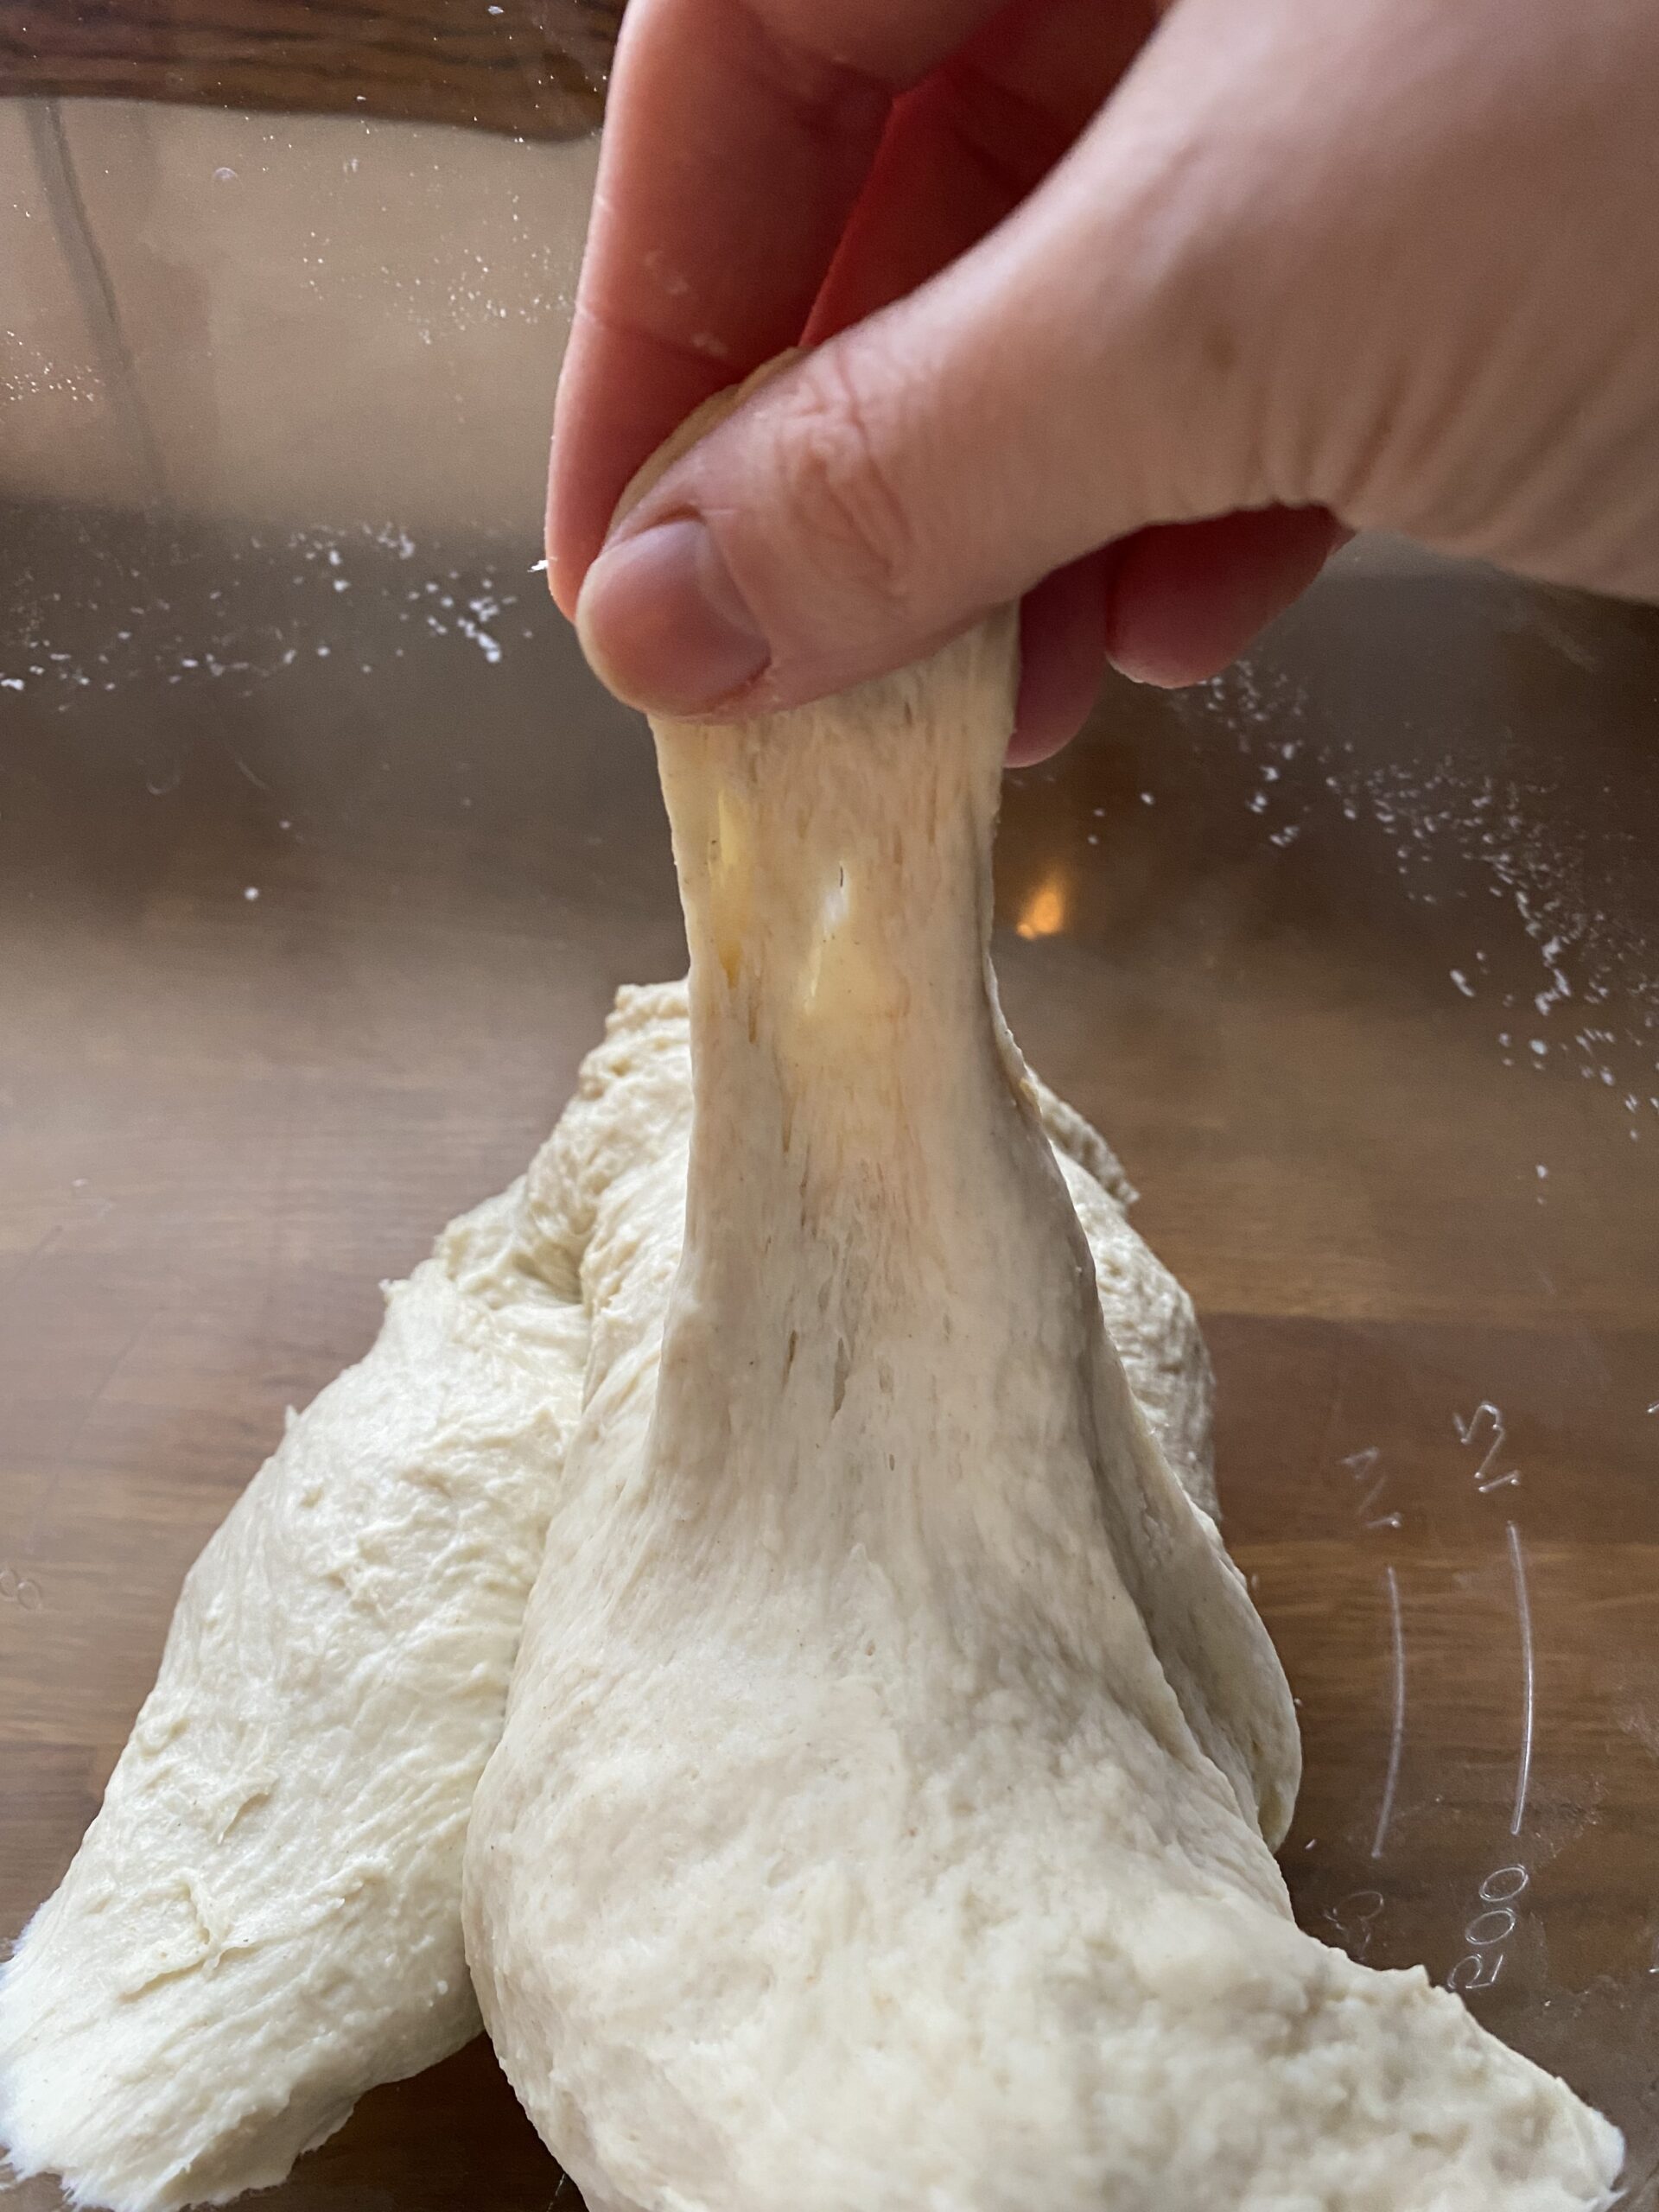
5-8 minutes by hand or on LOW speed in a stand mixer are all you need to get there. Then, let the dough rise until doubled in size.


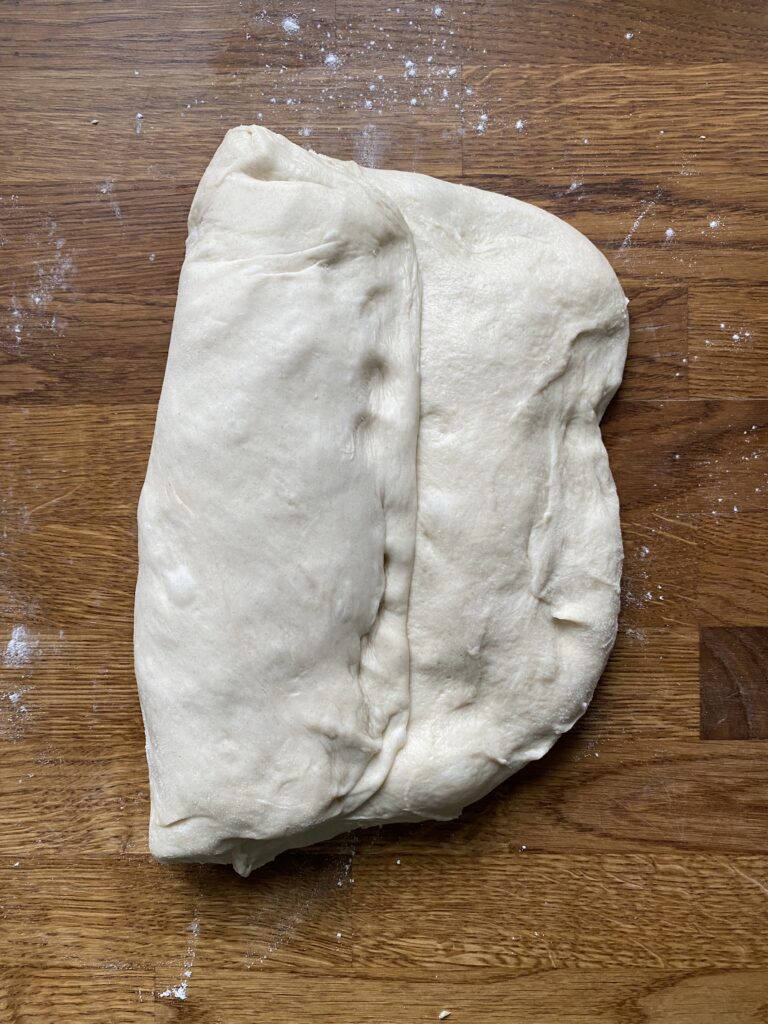
Shaping + The Second Rise
This bread actually does great with a lot of slack in it while shaping. No need for pre-shaping, cupping, or pulling.
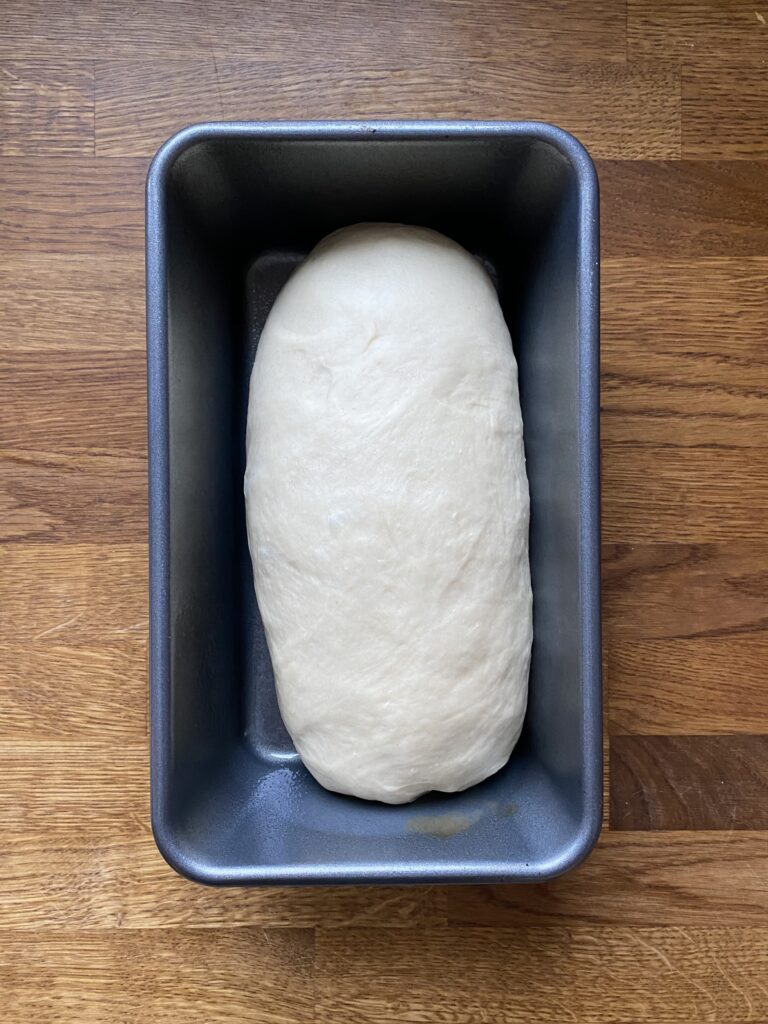
Just turn the risen dough out onto a lightly floured surface, press it out to pop any air bubbles that may have formed, fold it into thirds, pinch the ends to seal, then place it seam side-down into a 9-by-5 inch loaf pan.


Once it's risen about an inch past the rim of the loaf pan, it's ready to bake!

Baking
Bake on the bottom rack to slow down the crust browning. If it's browning too quickly, place a piece of foil over the top (I usually do this about 20 minutes into baking).
Just to be sure bread is baked through, I always like to take an internal temperature with a digital thermometer. There's nothing like cutting into a loaf and realizing it's underbaked. 200-205 degrees is what you're looking for!
Let it cool on a wire rack for 1 hour before slicing. It's hard to wait, but don't rush it!
Storage
This bread will keep for up to 5 days in an airtight container or plastic bag at room temperature.
To keep the crust as soft as possible, move the bread to a container as soon as it has cooled completely.
I HIGHLY recommend slicing and freezing so you can take slices out as needed!
Tips
- If you need to hit pause on the rise time, you can pop the dough in the fridge at any point in this recipe. You can extend the second rise overnight if you put it in the fridge right away. You'll need to bake it 45-50 minutes if you're doing it straight from the fridge.
- You can score straight down the middle of this loaf just before baking. I've had no issues with sides splitting in a 9-by-5 inch pan (I have in an 8-by-4), but if you want to control the rise more and have a split top, you can most definitely score it!
Now go make the best pb+j's of you life!
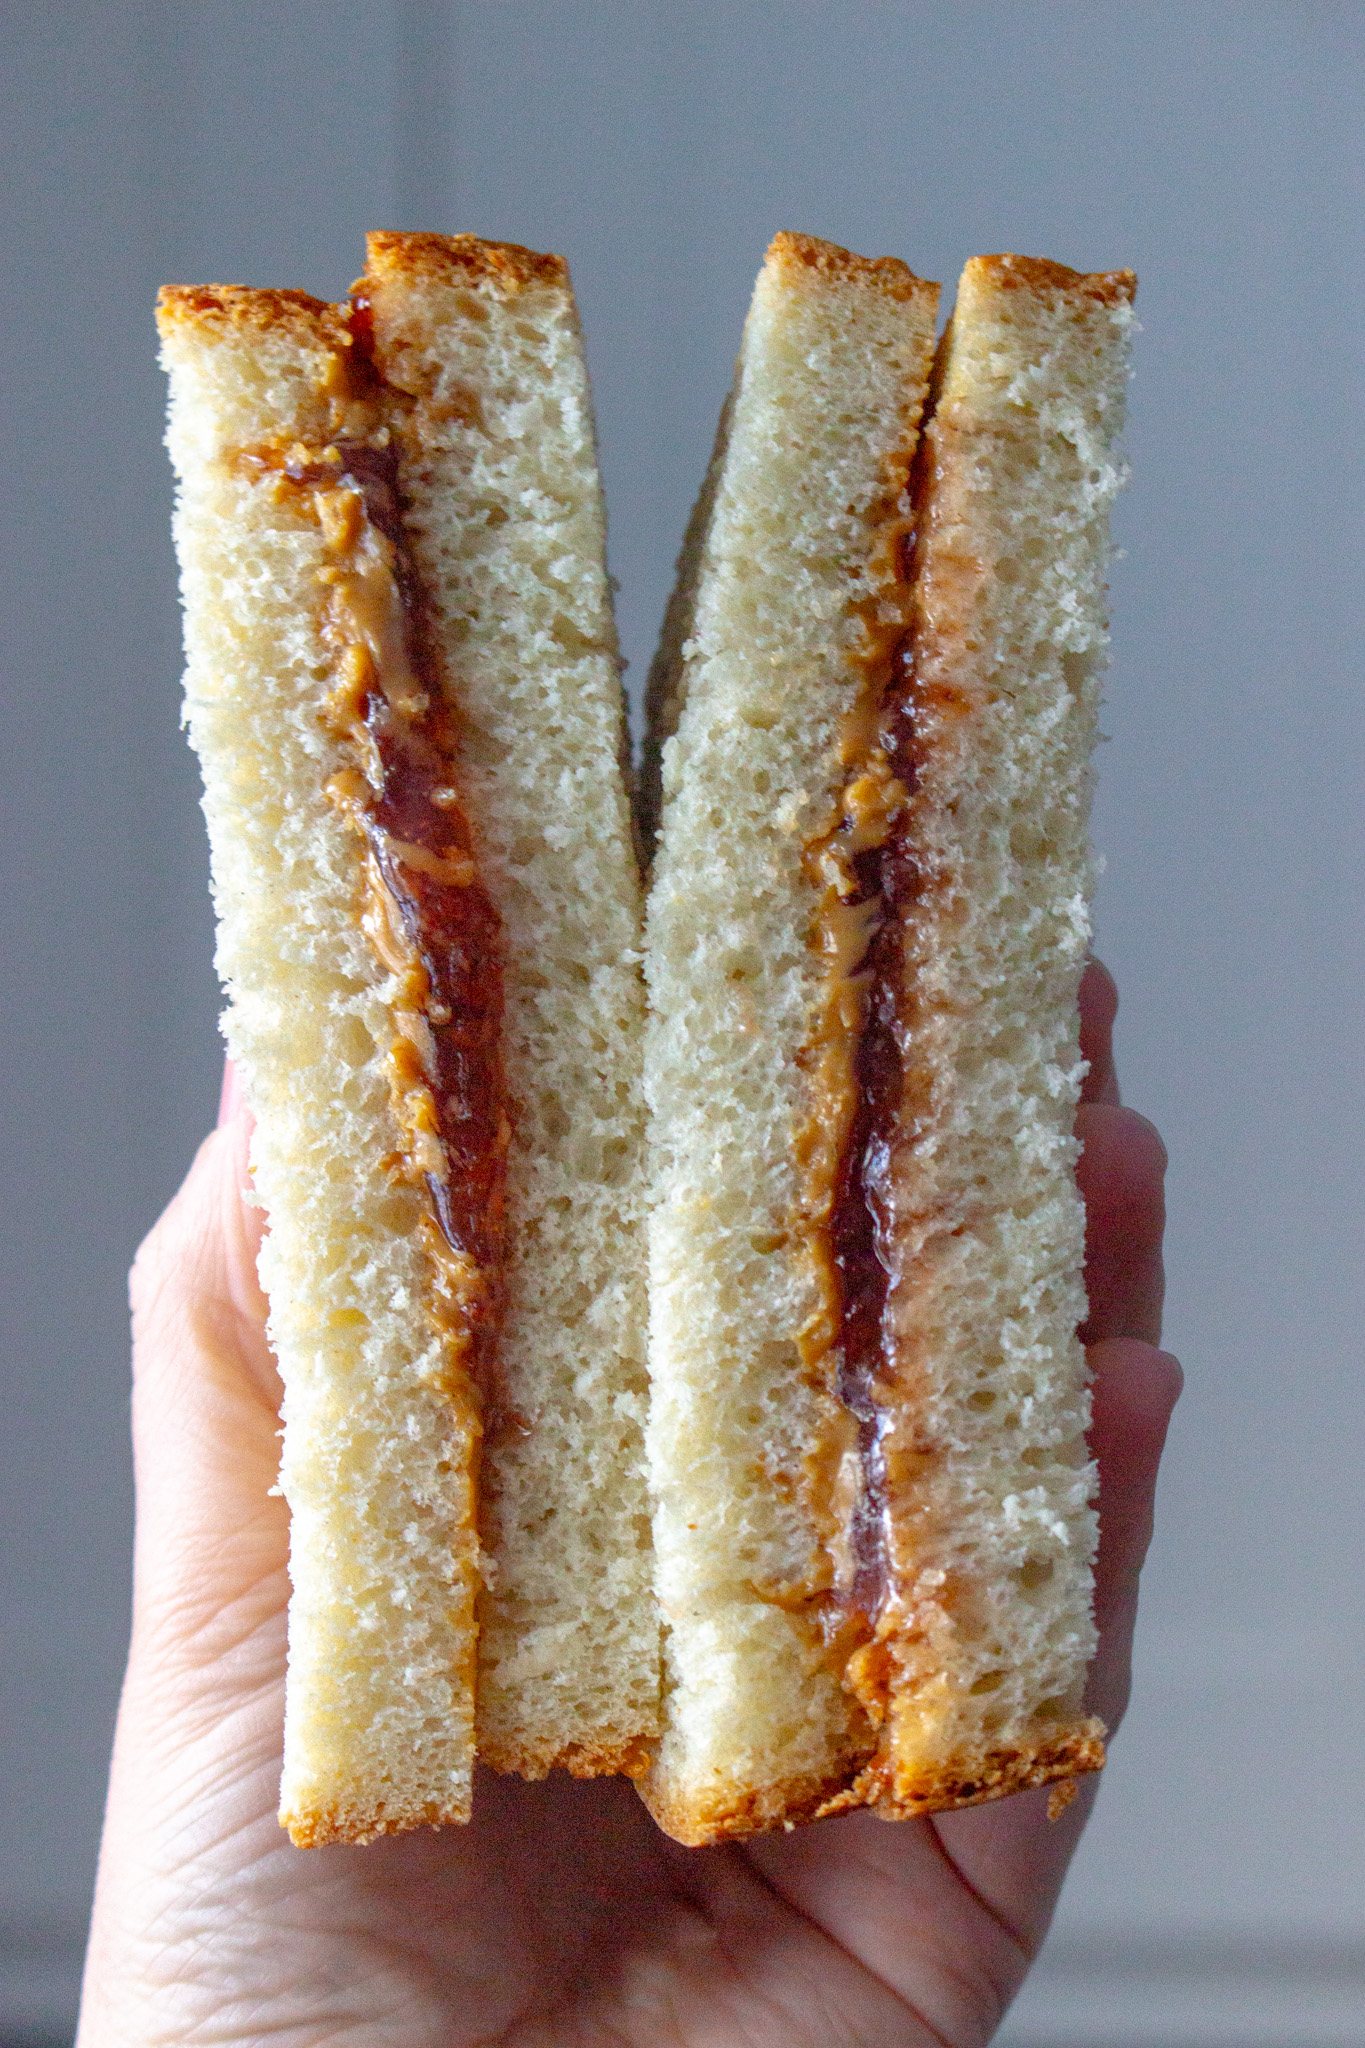
Oh, and also if anyone has a bread slicer recommendation for me, let me know! I feel like perfect slices are all that stand between me and completely replacing store bought bread in my house.

Sourdough Discard Sandwich Bread
Ingredients
- ½ cup warm water
- 1 cup sourdough discard
- 2 tablespoons sugar
- 2 tablespoons oil
- 1 packet ( 2 ¼ teaspoons) active dry yeast
- 2 ½ cups all purpose flour
- 1 ½ teaspoons salt
Directions
- Combine the water, discard, sugar, oil, and yeast in a large bowl. Add the flour and salt and mix until dough comes together. Knead for 5-8 minutes on a lightly floured surface, until the dough passes the windowpane test.Return to the bowl, cover, and let rise until doubled in size, about 1-2 hours. Grease a 9 by 5-inch loaf pan. Shape the dough into a loaf and place seam side down in the loaf pan. Cover and let rise until the dough rises 1-inch above the rim of the pan, about 1-2 hours more. Bake in a 350 degree oven on the bottom rack for 35-40 minutes, until baked through to an internal temperature of at least 200 degrees and browned to your liking. If the crust is browning too quickly, tent the loaf pan with foil - I usually do this at the 20 minute mark because we like this bread to have a soft, thin crust.Cool in the pan for 10 minutes, then invert the pan to release the bread. Cool 1 hour on a wire rack before slicing.Store leftovers in a plastic bag or other airtight container for up to 5 days at room temperature. You can also freeze this bread for up to 3 months.


Leave a Reply